A treadmill belt that slips underfoot or creeps steadily toward one side is easy to dismiss as a minor adjustment problem. Sometimes it is. A quarter-turn of an adjustment bolt may restore normal tracking. In other cases, however, the belt is reporting a different fault: inadequate lubrication, incorrect tension, an uneven floor, worn running surfaces, roller resistance, drive-belt trouble, debris, or a developing motor-control problem.
That distinction matters because the wrong correction can make the machine worse.
A loose running belt can slip and may need tightening. A belt already under excessive tension can also behave poorly, but further tightening increases mechanical drag. A drifting belt may require alignment, yet repeatedly steering it back toward the center will accomplish little if the entire treadmill is leaning because one leveling foot is incorrectly set.
The sensible troubleshooting method is therefore diagnostic rather than reactive. The user first identifies whether the belt is slipping, drifting, hesitating, or doing several things at once. Power is disconnected before physical inspection. The floor and belt condition are checked before adjustment. Tension and alignment are corrected in small increments. Lubrication is addressed only according to the manufacturer’s instructions. Persistent symptoms then move the investigation toward rollers, the drive belt, deck wear, motor controls, and professional service.
That order avoids turning a modest maintenance issue into a damaged belt, overloaded motor, or unsafe running surface.
Step 1: Determine Whether the Belt Is Slipping or Drifting
“Belt problem” describes several different behaviors.
A slipping belt usually feels as though the running surface pauses, jerks, or moves backward momentarily when the user’s foot strikes it. The console may indicate a constant speed even though the belt feels inconsistent under load.
A drifting belt behaves differently. It gradually moves sideways toward the left or right edge of the deck.
A third symptom is speed instability. The belt may accelerate, slow unexpectedly, hesitate without obvious foot pressure, or fail to maintain commanded speed.
These symptoms can overlap, but they point toward different areas.
Common patterns include:
- Slipping primarily under foot pressure: running-belt tension may be too low, although drive-belt slip, wear, or excessive friction can also produce similar behavior.
- Steady sideways drift: alignment, floor leveling, belt tension, or frame position deserves inspection.
- Jerking or irregular speed even with nobody on the treadmill: attention should shift toward the drive system, rollers, electronics, speed sensing, or mechanical resistance.
- Slow belt accompanied by noise or heat: friction or worn components may be increasing the load on the drive system.
- Drift combined with frayed edges: the belt may have been rubbing against a rail or frame component long enough to sustain damage.
Manufacturer service guidance supports this broader diagnostic approach. Current Horizon troubleshooting guidance directs attention to belt tension and centering, floor level, drive-belt alignment, wiring, and whether the running belt can be moved manually when diagnosing belt-movement problems.
The symptom should therefore be described accurately before any wrench is used.
Step 2: Stop the Machine and Inspect It Without Power
A moving treadmill is not the place for exploratory mechanical work.
Before touching the belt, reaching beneath it, checking rollers, or examining exposed hardware, the treadmill should be switched off and disconnected from the outlet according to its manual.
A useful initial inspection requires no adjustment at all.
Look for:
- Frayed belt edges.
- Cuts or cracking.
- Belt material rubbing against the side rails.
- Foreign objects near the rear or front roller.
- Debris trapped underneath the machine.
- Loose visible hardware.
- A running deck that appears crooked relative to the frame.
- Damage to roller end caps.
- A belt seam that looks distorted.
- Dark residue accumulating unusually quickly.
- Signs that lubricant has pooled near the edges.
With power disconnected, the belt can also be moved manually if the manufacturer permits it.
The resistance should feel reasonably smooth and consistent. Grinding, binding, scraping, or a pronounced hard spot suggests that simply tightening the belt is premature.
Horizon troubleshooting instructions for a belt that does not move or moves only briefly recommend trying to move the belt by hand and checking the drive belt and motor area when normal movement is absent.
That is a useful dividing line. If the belt is mechanically binding while the treadmill is unplugged, electronic troubleshooting is not the first priority.
Step 3: Check Whether the Treadmill Is Level
When a belt walks persistently toward one side, attention usually goes straight to the rear adjustment bolts.
The floor should be checked first.
A treadmill is a long machine with a moving belt stretched between rollers. If its frame is tilted or twisted because the floor is uneven, the belt can track toward one side even though the roller adjustment itself is close to correct.
Life Fitness identifies an uneven floor surface as one cause of a running belt moving off center and advises checking the machine’s levelers before correcting belt tension.
The practical inspection is straightforward:
- Place the treadmill in its normal operating location.
- Make certain all feet or levelers contact the floor correctly.
- Check whether the frame rocks when pressure is applied at different corners.
- Inspect the protective mat, if present, for folds or compression.
- Adjust the leveling feet according to the manufacturer’s instructions.
- Recheck belt behavior before changing rear-roller alignment.
Carpet can complicate the diagnosis because thick pile or underlay may compress unevenly.
The machine does not need laboratory-grade leveling equipment for an initial check, but visible rocking or a frame that sits noticeably higher on one side should be corrected before belt tracking is altered.
Step 4: Test Belt Tracking at a Slow Speed
Once gross mechanical problems and floor leveling have been checked, belt alignment can be observed under controlled conditions.
Nobody should run on the treadmill during the initial tracking test.
The machine can be started at the low speed specified by the manufacturer while the user stands beside it. The belt should be watched for several revolutions rather than judged from its first few seconds of movement.
Some belts move slightly during startup and then stabilize. A genuine tracking problem keeps migrating.
Horizon guidance for a loose, drifting, or slipping running belt provides a useful example of how small these corrections can be. For the covered machines, it calls for running the treadmill at 1 mph during centering and making adjustments in quarter-turn increments.
That quarter-turn principle illustrates a broader rule: belt alignment should be corrected incrementally.
Large wrench movements can send the belt from one side to the other and alter tension more than expected.
The precise bolt and turning direction vary by manufacturer and model. The machine’s own manual should therefore determine which adjustment bolt is used and which direction it turns.
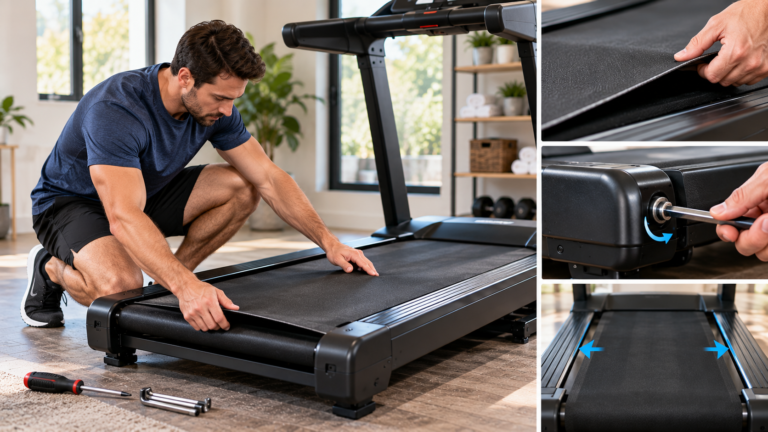
Step 5: Correct a Drifting Belt in Small Increments
Rear-roller adjustment changes the relationship between the belt and roller. Small changes steer the belt laterally.
The adjustment should not be treated like tightening a loose shelf bracket.
A sensible procedure is:
- Use the specified wrench.
- Follow the model-specific left-versus-right correction instructions.
- Move the adjustment bolt only by the recommended fraction of a turn.
- Allow the belt enough time to respond.
- Repeat only if necessary.
- Stop once the belt remains centered during operation.
A belt does not need to sit with geometric perfection to the nearest millimeter. It needs adequate clearance from both sides and stable tracking under normal use.
Continually “chasing” the belt with repeated adjustments can produce excessive tension or misalignment.
If a belt refuses to remain centered despite careful adjustment, another condition deserves investigation. Uneven tension, roller problems, structural misalignment, worn belt material, or installation errors can defeat ordinary tracking corrections.
Step 6: Test for Running-Belt Slippage Under Load
A belt that looks perfectly centered may still slip when a user walks or runs on it.
That difference is diagnostically useful.
If the belt moves normally with no weight on it but hesitates during foot strike, running-belt tension becomes a reasonable suspect. The belt may not have enough grip around the rollers to resist the load created when a foot lands.
The test should be performed at a modest walking speed, not during a sprint.
A slipping sensation may present as:
- A brief backward jerk.
- A pause beneath one foot.
- A repeated catch at heavier foot strikes.
- Smooth operation without a user but inconsistent motion once body weight is applied.
Horizon states that a slipping sensation can indicate that the running belt requires tensioning and warns that over-tightening can cause excessive wear to the treadmill and its components.
That second point matters: more tension is not automatically better.
Step 7: Tighten a Loose Belt Without Over-Tightening It
When the manufacturer’s test confirms insufficient running-belt tension, adjustments should generally be even and small.
On many treadmills, tightening requires turning both rear-roller bolts by equal amounts so overall tension increases without intentionally steering the belt.
The exact procedure belongs to the model manual.
A practical sequence is:
- Disconnect power.
- Mark or remember the starting bolt positions.
- Adjust each side by the same small increment when tensioning rather than centering.
- Restore power.
- Test at low speed.
- Test carefully under walking load.
- Repeat only if slippage remains.
The temptation is to keep tightening until the belt feels extremely firm.
That approach can produce excessive mechanical drag.
Life Fitness notes in its guidance for several Cybex treadmill systems that a belt seam can tear if the belt is installed backward or over-tightened, while a worn belt or one drawing high amperage should be replaced rather than endlessly adjusted.
A treadmill belt is therefore not a guitar string. Maximum tightness is not the objective.
Correct grip with minimum unnecessary tension is.
Step 8: Check Lubrication Before Blaming the Motor
A treadmill can feel weak even when the motor itself is functioning.
The reason is friction.
The running belt slides across the deck while supporting body weight. On systems requiring lubrication, insufficient lubricant increases friction between those surfaces. The motor then has to overcome more resistance to maintain belt speed.
Symptoms can include:
- Speed dropping under load.
- A belt that feels reluctant to start.
- Increased motor sound.
- Heat.
- Hesitation.
- Error codes associated with failure to reach or maintain speed.
- Higher electrical load.
Yet adding lubricant blindly is equally problematic.
Some treadmills require silicone lubricant at specified intervals. Others use waxed or maintenance-free running surfaces that should not receive the same treatment.
The exact model instructions therefore take priority.
Horizon distinguishes silicone running surfaces from waxed systems, stating that its applicable silicone surfaces require periodic lubrication while its waxed decks and belts are intended to have nothing added to them.
Lubrication should be considered when a compatible treadmill shows increased friction, but it should not become the universal answer to every slipping symptom.
Step 9: Distinguish Running-Belt Slip From Drive-Belt Slip
A treadmill usually has more than one belt.
The broad walking surface is the running belt. Inside the motor compartment, many treadmills also use a narrower drive belt connecting the motor to the front roller.
Either can slip.
Running-belt slip often feels directly related to the user’s foot strike. The visible belt momentarily hesitates against the deck.
Drive-belt slip can create a different sensation: the motor appears to operate, but torque is not transferred reliably to the front roller.
Possible symptoms include:
- A sudden speed drop under load.
- A squeal from the motor area.
- Belt movement that becomes unreliable during acceleration.
- A motor that sounds active while the walking surface hesitates.
The drive belt should therefore remain part of the diagnosis when ordinary running-belt tension does not resolve slipping.
Drive-belt service often requires removal of the motor cover and exposes moving mechanical and electrical components. For many users, that is the point where owner maintenance should stop and qualified service should begin.
Step 10: Inspect for a Worn Belt or Deck
Adjustment cannot restore material that has worn away.
A treadmill with substantial use can develop deterioration on the underside of the running belt, the upper surface of the deck, or both.
The visible upper belt may still look acceptable.
The working surfaces are underneath.
Life Fitness troubleshooting guidance identifies a worn deck laminate or a glazed, hard, shiny underside of the walking belt as a condition requiring belt and deck replacement on the systems covered by its service documentation.
Wear can produce several misleading symptoms:
- Increased friction.
- Sluggish performance.
- Belt slip.
- Reduced attainable speed.
- Unusual heat.
- Repeated tension adjustments that do not solve the problem.
This is one reason older treadmills should not be adjusted indefinitely.
When the belt repeatedly loses correct behavior after tension and alignment have been established, physical wear deserves serious consideration.
Step 11: Look for Mechanical Drag and Debris
Not every resistance problem originates at the belt-and-deck interface.
A treadmill contains front and rear rollers, bearings, a drive motor, and related rotating parts. Hair, carpet fibers, small objects, or deteriorated material can interfere with movement.
Life Fitness diagnostic guidance for excessive mechanical drag identifies belt, deck, or roller wear or contamination, bearing damage, and trapped debris among conditions that can degrade treadmill speed performance.
A rubbing sound beneath the treadmill also warrants a physical inspection before electronic parts are blamed.
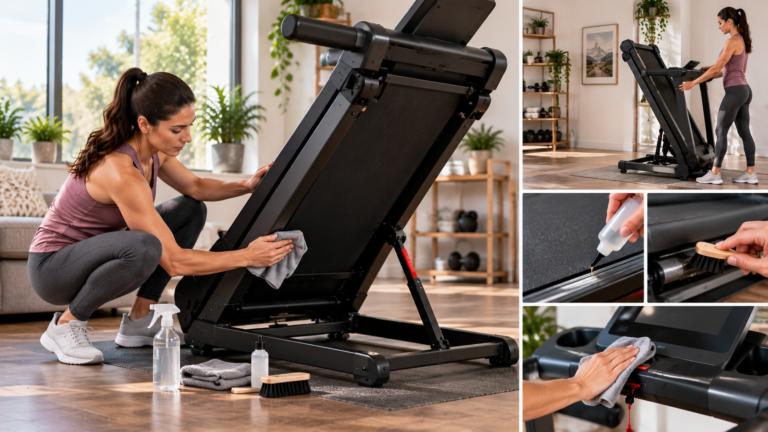
With power disconnected, check accessible areas for:
- Objects under the machine.
- Debris near rollers.
- Fabric or hair wrapped around rotating parts.
- Belt edges contacting fixed components.
- Damaged roller end areas.
- Unusual resistance when the belt is manually moved.
Debris should be removed only where it can be reached safely without disassembling protected components contrary to the manufacturer’s instructions.
Grinding bearings, damaged rollers, or severe resistance generally require repair rather than further belt adjustment.
Step 12: Consider Electrical and Speed-Control Faults When Mechanical Checks Pass
If the treadmill changes speed unpredictably while unloaded, physical belt tension becomes less persuasive as the sole explanation.
Modern treadmills regulate motor speed through electronic controls and feedback systems. Depending on the design, faults can involve speed sensors, motor controllers, wiring, calibration, console commands, or related electronics.
Horizon troubleshooting guidance for erratic treadmill speed directs users to examine the power source, console wiring, belt tension and lubrication, and possible recalibration when a treadmill stops, resets, or runs at an irregular speed.
Electrical diagnosis should not be reduced to replacing parts until the symptom disappears.
Warning signs that merit professional service include:
- Belt acceleration without a speed command.
- Repeated speed errors after mechanical causes have been addressed.
- Unexpected shutdowns.
- Burnt electrical odors.
- Visible arcing.
- Error codes returning after basic maintenance.
- Motor behavior that is inconsistent with the console setting.
A treadmill whose speed changes unpredictably should not remain in normal exercise use.
Step 13: Know When the Belt Itself Needs Replacement
A belt does not last indefinitely.
Replacement becomes more likely when there is:
- Persistent fraying.
- A damaged seam.
- Cracking.
- Hard or glazed underside material.
- Stretch that can no longer be corrected within normal adjustment.
- Repeated lateral instability despite proper setup.
- Excessive friction after correct lubrication.
- Physical contamination that cannot be removed safely.
Replacement schedules differ sharply among treadmill designs. Commercial machines, home treadmills, pre-waxed systems, and lightweight folding units cannot share one credible mileage rule.
That is why generic statements such as “replace every X years” are weak maintenance advice.
Use condition, operating history, manufacturer guidance, and measured performance instead.
Step 14: Avoid the Five Fixes That Often Make the Problem Worse
Several instinctive responses deserve particular caution.
Tightening the Belt Repeatedly
If one adjustment helps temporarily and the symptom quickly returns, continued tightening may be masking wear, inadequate lubrication, drive-belt problems, or another fault.
Making Large Alignment Adjustments
A half-turn or full turn can be much larger than required. Quarter-turn corrections are common in manufacturer guidance for a reason.
Lubricating Every Belt
Some systems are designed around different lubrication methods or pre-treated materials. The manual decides whether lubricant belongs beneath the belt.
Adjusting While Running at High Speed
Alignment tests should be performed at the manufacturer’s prescribed low speed. Hands, hair, clothing, tools, and fingers should remain clear of the moving belt.
Ignoring Floor Level
A machine that is not stable or level may keep pulling the belt sideways no matter how carefully the rear roller is adjusted.
Step 15: Use a Diagnostic Order That Prevents Guesswork
A disciplined sequence makes treadmill troubleshooting far easier.
For a Belt That Drifts Sideways
- Stop and disconnect the treadmill.
- Inspect the belt for damage or rubbing.
- Confirm the treadmill is stable and level.
- Check whether visible belt tension appears uneven.
- Run the machine unloaded at the low speed prescribed by the manufacturer.
- Make the specified small tracking correction.
- Allow the belt time to stabilize.
- Test again under normal walking load.
- Seek service if it will not hold alignment.
For a Belt That Slips Underfoot
- Inspect the running belt and deck.
- Confirm appropriate lubrication for the model.
- Check running-belt tension.
- Increase tension only by the manufacturer’s approved amount.
- Test at low speed.
- Stop tightening if correct tension fails to eliminate the symptom.
- Investigate drive-belt slip, deck wear, rollers, and drive-system faults.
For a Belt With Erratic Speed
- Determine whether the problem occurs without a user.
- Check for mechanical binding.
- Inspect belt tension and lubrication.
- Check accessible rollers and debris.
- Note any displayed error codes.
- Stop normal use if speed changes unexpectedly.
- Move to qualified electrical or drive-system diagnosis if mechanical checks are normal.
This hierarchy eliminates many unnecessary adjustments.
Step 16: Factor Belt Serviceability Into Treadmill Selection
Belt troubleshooting also exposes an overlooked part of treadmill ownership: maintainability.
People comparing the best treadmills for home often study motor specifications, screens, maximum incline, folded dimensions, and workout software. Belt-adjustment documentation receives far less attention until something starts moving sideways.
A treadmill intended for years of home use benefits from:
- Clearly accessible belt-adjustment bolts.
- Model-specific alignment instructions.
- Published lubrication requirements.
- Replacement-belt availability.
- Accessible technical support.
- Clear maintenance schedules.
- Stable leveling systems.
- Service documentation that distinguishes routine owner adjustment from technician work.
Ease of adjustment does not guarantee durability, but clear service procedures reduce the likelihood of guesswork.
A treadmill whose manual simply says “contact support” for every minor alignment issue can impose a different ownership burden from one with documented routine adjustment procedures.
Final Considerations
A slipping or drifting treadmill belt is best treated as a symptom, not a diagnosis.
Sideways drift can begin with something as simple as an uneven floor or a modest tracking error. Slippage can arise from insufficient running-belt tension. But those same sensations can also accompany inadequate lubrication, worn deck material, a deteriorated belt, roller resistance, drive-belt slip, debris, excessive mechanical drag, or faults in the speed-control system.
The repair sequence matters.
The machine should first be disconnected and physically inspected. Stability and floor level come next. Tracking is then observed at low speed. Alignment corrections are made in small increments. Slipping under load prompts a tension check, but tightening stops once the manufacturer’s specification is reached. Lubrication is addressed only when the model calls for it. Persistent hesitation or speed instability shifts attention toward wear, rollers, the drive system, and electronics.
That sequence is less dramatic than attacking the rear bolts every time the belt misbehaves. It is also mechanically sound.
A treadmill belt should run near the center, move smoothly, and maintain speed without grabbing, lurching, or requiring constant correction. When it does not, careful observation usually narrows the possibilities quickly.
The useful question is not merely, “How can the belt be tightened?”
It is, “Why is the belt behaving differently?”
Once that question is answered, the correct fix is usually much easier to identify.