Machine embroidery can fail before the needle makes its first stitch.
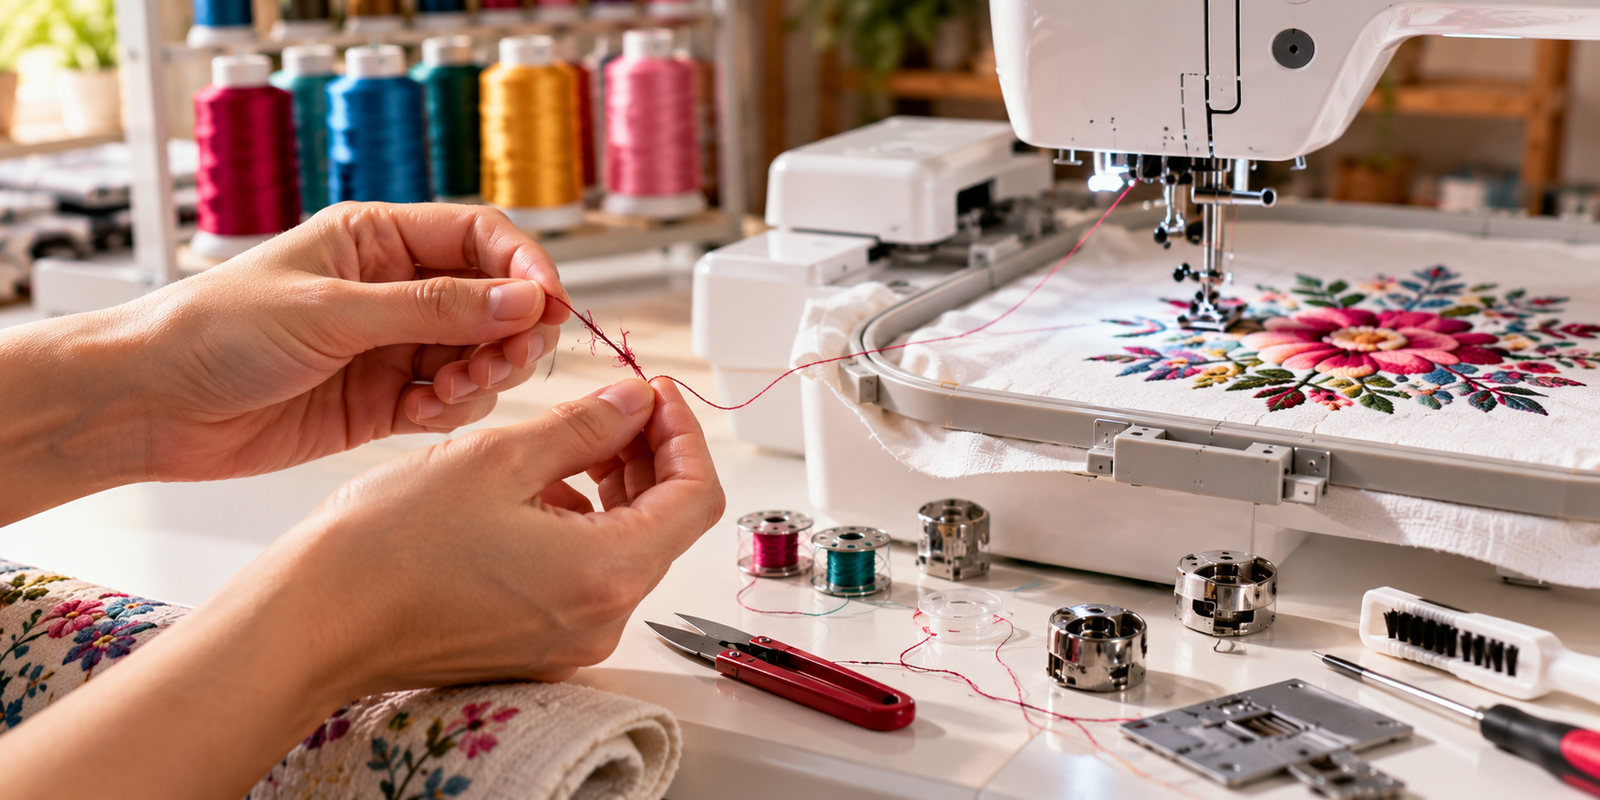
The design may be digitized correctly. The thread may be appropriate. The needle may be fresh. The machine may be functioning exactly as intended. Yet if the fabric enters the hoop stretched, crooked, loosely supported, or paired with the wrong stabilizer, the finished embroidery can pucker, shift, distort, or land several millimeters away from its intended position.
Hooping looks deceptively simple because the equipment is simple: an inner frame, an outer frame, fabric, and stabilizer. The difficulty lies in controlling tension without deforming the material.
Brother’s basic machine-embroidery instructions capture the principle in unusually concise language: the fabric and stabilizer should be “taut but not stretched.” That guidance appears in the company’s beginner embroidery procedure, and those four words describe the central technical challenge better than aggressive tightening ever could.
Proper hooping does not mean pulling fabric until it resembles a drumhead. It means creating a stable embroidery surface while allowing the fabric to retain its natural shape.
The distinction matters because machine embroidery is not passive decoration. The hoop moves rapidly in multiple directions while a needle repeatedly penetrates the same area. Dense designs place thousands of stitches into a comparatively small piece of cloth. Each stitch applies forces to fabric that would rather move.
The hoop and stabilizer are what prevent it from doing so.
Understand What the Hoop Is Actually Doing
An embroidery hoop has two related jobs.
First, it positions the fabric within the machine’s embroidery field. Second, it limits movement while the embroidery unit shifts the fabric underneath the needle.
Those jobs sound straightforward until fabric behavior enters the equation.
A stable woven cotton may remain relatively predictable. A jersey knit stretches. Terry cloth compresses. Velvet has a pile that can be marked by pressure. Lightweight fabric may distort under a dense design. Heavy ready-made objects may resist conventional hooping entirely.
The objective is therefore not maximum tension. It is controlled stability.
Sulky’s detailed machine-embroidery hooping guidance warns against tugging the fabric after it is placed in the hoop. Pulling a woven fabric outward can distort its weave; after embroidery, the stretched fibers relax and can contribute to puckering around the design.
That explains one of machine embroidery’s most common paradoxes: tightening fabric more aggressively can make the finished work look less controlled.
The correct method begins before the hoop touches the fabric.
Step 1: Choose the Smallest Practical Hoop
Start with the embroidery design rather than the garment.
Determine the design’s finished width and height, then select a hoop that accommodates it with adequate clearance.
A larger hoop is not automatically preferable.
Fabric held in a large frame has a larger unsupported area. Depending on the material, that can allow more movement than a smaller hoop surrounding the design more closely. Smaller appropriate hoops can also consume less stabilizer and make positioning easier.
The design must still fit safely within the machine’s defined sewing field. Crowding the frame edge leaves little room for adjustment and increases the risk of a placement error.
When the machine offers several compatible hoop sizes, the practical rule is straightforward:
- use a hoop large enough for the complete design;
- avoid moving to a much larger frame without a reason;
- confirm the design dimensions before cutting stabilizer;
- verify that the chosen hoop is recognized by the machine.
This becomes especially relevant when designs are downloaded from external libraries rather than selected from the machine’s built-in collection.
Step 2: Prepare the Fabric Before Marking It
Fabric should be in the condition in which it will be embroidered.
Wrinkles create misleading reference lines. Fold creases can change alignment. Shrinkage after embroidery can alter the relationship between the stitched area and surrounding fabric.
Press fabrics that can safely be pressed.
If the finished item will routinely be washed and the fabric has a meaningful risk of shrinkage, prewashing may be appropriate before embroidery. That decision depends on the material and project, but embroidery is generally easier to position accurately on fabric whose dimensions are already stable.
Lay the item on a flat working surface without pulling it.
For a garment, identify structural references such as:
- center front;
- center back;
- neckline;
- shoulder seam;
- pocket;
- placket;
- hem;
- side seam.
The embroidery should be positioned in relation to the finished garment, not merely the rectangular piece of fabric that happens to fit inside the hoop.
That distinction prevents a technically centered design from looking visually misplaced when the item is worn or used.
Step 3: Mark the Design Center
Accurate hooping becomes far easier when the fabric contains visible placement references.
Brother’s embroidery instructions recommend marking horizontal and vertical centerlines that intersect at the planned center of the design.
That creates a crosshair.
The center point indicates where the center of the embroidery should fall. The horizontal line controls rotation. The vertical line helps align the design with the garment or fabric grain.
Use a marking method appropriate for the material. Depending on the project, that might include:
- a removable fabric marker;
- tailor’s chalk;
- removable tape;
- temporary basting;
- water-soluble marking material.
A permanent pen has no place in an area where the mark may remain visible.
Before committing to the center point, compare the actual embroidery dimensions with the available space. A design centered mathematically inside a pocket, for example, may not look centered visually if its shape is asymmetrical.
The machine’s preview or tracing function can help expose that issue later, but good placement begins on the fabric.
Step 4: Match the Stabilizer to the Fabric and Design
A hoop cannot control embroidery by itself.
Stabilizer carries much of the mechanical load generated during stitching.
Janome’s embroidery-machine documentation on stabilizers states that stabilizer should be cut larger than the embroidery hoop so that the entire piece is secured within the frame. The manual also advises additional or heavier stabilization when sewing dense embroidery designs.
That larger-than-the-hoop requirement is easy to underestimate.
If the stabilizer barely reaches the inner edge of the frame, it cannot be gripped properly. The fabric may appear secure while the supporting layer shifts underneath it.
As a general working framework:
- stable woven fabrics often work with tear-away or suitably selected cut-away stabilizer depending on the design;
- stretchy knits commonly benefit from cut-away support;
- delicate or difficult-to-hoop materials may work better with adhesive-backed stabilizer;
- textured fabrics may require a water-soluble topping on the face of the material;
- dense embroidery may require stronger or multiple layers of support.
The design matters alongside the fabric.
A small open line drawing places much less stress on fabric than a dense filled logo containing thousands of closely packed stitches. The same shirt can therefore require different stabilization depending on what is being embroidered onto it.
The stabilizer should support the finished embroidery without making the surrounding item unnecessarily rigid.
Step 5: Loosen the Outer Hoop Before Inserting the Fabric
Place the outer hoop on a hard, flat work surface.
Loosen its adjustment screw enough that the inner hoop can enter after the fabric and stabilizer have been added.
Do not fully tighten the screw first and then force the inner frame through several layers.
Excessive force can shift the marked center, distort the fabric, and turn hooping into a wrestling exercise.
A useful setup sequence is:
- Put the outer hoop flat on the table.
- Position the stabilizer over it.
- Position the fabric over the stabilizer.
- Align the marked center with the hoop’s reference marks.
- Set the inner hoop over the fabric.
- Press it evenly into the outer hoop.
Sulky specifically recommends working on a hard, flat surface rather than trying to assemble the hoop in midair. A flat table makes it easier to control alignment and distribute pressure evenly.
The difference is surprisingly large. Hooping on a lap or soft bed allows the outer ring to move while pressure is applied, making distortion more likely.
Step 6: Align the Fabric Before Pressing the Inner Hoop Down
Once the stabilizer and fabric are stacked over the outer hoop, stop and examine alignment.
The marked vertical and horizontal lines should correspond with the hoop’s reference marks or template grid.
If the fabric is woven, its grain can provide another visual check.
A design that is centered but rotated slightly may look acceptable while still in the hoop. On a finished shirt, towel, pocket, or quilt block, even a small tilt can become conspicuous because the surrounding seams and edges provide straight reference lines.
This is why placement grids are useful.
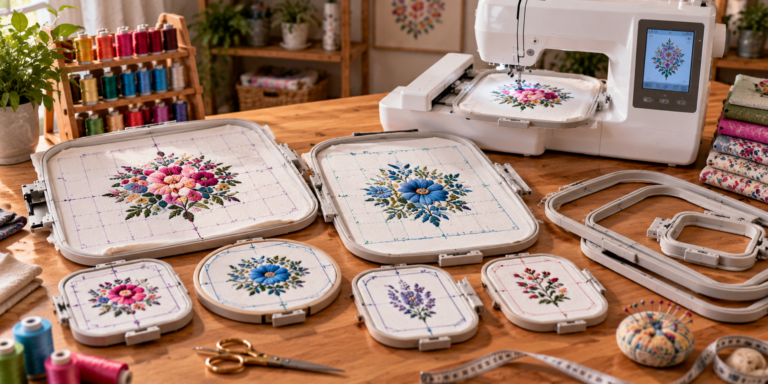
Many embroidery hoops include plastic templates marked with centerlines. Those templates can help position the design before stitching, though the operator should confirm how the particular machine defines the embroidery center and usable field.
Do not assume every physical mark on a hoop represents the exact center of every design configuration.
Step 7: Press the Inner Hoop Into Place Evenly
Press the inner hoop downward using balanced pressure.
Avoid pushing one end completely into place and then forcing down the opposite end. That can drag fabric across the stabilizer.
The fabric should enter the hoop in its relaxed condition.
Once seated, inspect the surface.
There should be:
- no wrinkles;
- no folds;
- no loose bubbles;
- no obvious stretching;
- no diagonal distortion;
- no shifted center marks.
If the surface is visibly wrong, remove it and repeat the process.
Trying to repair poor hooping after the fabric has already been distorted rarely saves time.
Step 8: Tighten the Hoop Without Stretching the Fabric
This stage causes many avoidable embroidery failures.
After the inner hoop is inserted, tighten the outer hoop screw enough to hold the layers securely.
Do not pull outward on the fabric merely to make it look tighter.
That action can stretch the material beyond its natural dimensions. The embroidery is then stitched onto fabric held in an artificially expanded condition. When the hoop is removed, the fabric attempts to return to its relaxed shape while the dense embroidery remains relatively fixed.
Puckering can follow.
The phrase “drum tight” is often used in embroidery discussions, but it can be misleading when interpreted as a command to stretch the cloth aggressively.
Stabilizer can carry substantial tension. Fabric should remain smooth and secure without being materially distorted.
The goal is not maximum resistance to a fingertip. The goal is preventing movement while preserving the material’s natural geometry.
Step 9: Check the Back of the Hoop
Turn the hoop over before attaching it to the machine.
The stabilizer should remain flat and securely captured around the frame. Fabric should not be folded underneath the embroidery area.
This inspection is particularly necessary with garments.
A T-shirt has two layers. A sleeve forms a tube. A bag may have a lining. A sweatshirt can bunch underneath the hoop.
If an unintended layer remains underneath the embroidery field, the machine can stitch it to the design.
That error is remarkably efficient: the machine can permanently sew a shirt front to its back in a matter of minutes.
Arrange all excess fabric away from the stitching field before starting.
Clips can sometimes help control loose fabric, provided they remain safely outside the hoop’s moving path.
Step 10: Attach the Hoop Without Pulling on It
Carry the hoop by its frame rather than using the fabric as a handle.
Attach it to the embroidery unit according to the machine’s instructions.
Once mounted, the hoop should move freely.
Avoid allowing a heavy garment to hang from one side in a way that pulls against frame movement. Supporting the weight of a sweatshirt, jacket, blanket, or bag on the machine table can reduce drag.
The embroidery unit needs freedom to move the hoop through its programmed path.
Anything resisting that movement can affect registration.
This is where furniture matters more than it seems. A machine placed against a wall may not have adequate clearance for a large hoop moving toward the rear. A piled-up garment can catch against the machine. A loose sleeve can fall into the embroidery area.
Clear the full travel path before stitching.
Step 11: Use the Machine’s Trace or Trial Function
Do not begin stitching immediately after attaching the hoop.
If the machine provides a design-outline, trace, trial, or checking function, use it.
Brother’s frame-hooping guidance specifically advises using a trial run for cylindrical items with small openings so the operator can verify that the frame can move without catching.
A trace serves two purposes.
First, it confirms physical clearance.
Second, it reveals whether the design is actually positioned where expected.
Watch the needle position or machine indicator as the system traces the design boundary.
Check:
- top edge;
- bottom edge;
- left edge;
- right edge;
- relationship to seams or pockets;
- clearance from hoop edges;
- movement of surrounding fabric.
This inspection takes far less time than removing several thousand stitches after discovering that a logo is crooked or partially outside its intended area.
Step 12: Float Fabric When Conventional Hooping Is a Bad Idea
Not every item should be sandwiched between the inner and outer frame.
Some objects are too small. Others are too thick, textured, delicate, or structurally awkward.
The alternative is commonly called floating.
The stabilizer is hooped securely by itself. The fabric or finished item is then attached to the stabilizer above the hoop rather than captured between both hoop rings.
Sulky’s machine embroidery FAQ describes this method for materials that are difficult to hoop conventionally, including textured fabrics vulnerable to visible hoop marks.
Floating can be useful for items such as:
- collars;
- small pockets;
- cuffs;
- some towels;
- velvet or other marked pile fabrics;
- certain bags;
- very small garment sections;
- bulky ready-made items.
The fabric still must be secured.
Depending on the material and stabilizer system, attachment may involve adhesive-backed stabilizer, temporary embroidery adhesive, machine basting, or another method appropriate for the project.
“Hoopless embroidery” is therefore somewhat misleading language. The hoop still controls the stabilizer and defines the machine’s working frame. The fabric simply is not trapped between the hoop rings.
Step 13: Handle Knits Differently From Stable Wovens
Stretch fabrics expose poor hooping quickly.
A knit can look perfectly smooth after being pulled into a hoop because stretching removes visible wrinkles. That smooth surface is deceptive.
Once released, the knit contracts.
A dense embroidery design does not contract at the same rate.
The result can be a ring of puckering around otherwise competent embroidery.
Knits should therefore enter the hoop relaxed rather than stretched. Cut-away stabilizer is commonly used because it remains behind the embroidery after the project is complete, supporting stitches during wear and laundering.
The operator should smooth rather than pull.
If the garment is floated, it must still remain sufficiently secured that the knit cannot creep during stitching.
A temporary basting outline around the design can help hold layers together when the machine provides that function.
Step 14: Treat Terry Cloth, Fleece, and Pile Fabrics as Three-Dimensional Surfaces
Textured fabrics create a different problem.
Even when they are securely stabilized, embroidery stitches can disappear into the pile.
A water-soluble topper placed over the fabric can create a temporary surface that keeps stitches above loops or fibers while embroidery is being formed.
Sulky’s guidance for embroidered blanks recommends a topper for fabrics with nap, including terry, velvet, and corduroy.
The topper and backing perform different jobs.
The backing stabilizer supports the fabric from below.
The topper controls the texture from above.
Using one does not automatically eliminate the need for the other.
Textured fabrics can also suffer hoop marks, particularly when the surface pile is crushed between the rings. Floating is often useful when direct hooping risks permanently altering the appearance.
Step 15: Do Not Ignore Design Density
Hooping technique cannot be separated from digitizing.
A small, lightly stitched motif may tolerate conditions that a dense filled design will expose immediately.
Dense embroidery can pull fabric inward as stitches accumulate.
This is sometimes called push-and-pull distortion. Stitch direction, fabric stretch, stabilization, design density, underlay, and hooping all influence the visible result.
When a design repeatedly puckers despite correct hooping, adding more hoop tension may be exactly the wrong response.
The problem may instead involve:
- insufficient stabilization;
- excessive stitch density;
- inappropriate underlay;
- incompatible fabric;
- incorrect thread or needle;
- poor digitizing;
- a design too large or dense for the material.
Equipment quality cannot eliminate those relationships. Even the best sewing and embroidery machines still rely on properly prepared fabric and suitable embroidery data.
Step 16: Test the Entire Setup
A test stitch-out can prevent expensive damage.
Ideally, use the same or very similar fabric, stabilizer, thread, needle, and design settings planned for the finished item.
A scrap of unrelated cotton tells little about how a dense logo will behave on stretchy performance knit.
The test should answer specific questions:
- Does the fabric pucker after removing the hoop?
- Does the stabilizer provide enough support?
- Does the thread sit cleanly on the surface?
- Does the fabric show permanent hoop marks?
- Are outlines aligned with filled areas?
- Does the design feel excessively stiff?
- Does the chosen placement look proportional at full size?
Testing is especially useful before embroidering objects that cannot easily be replaced: finished jackets, customer garments, bags, uniforms, quilts, or heirloom textiles.
The embroidery machine can repeat a mistake with exceptional precision. Testing interrupts that efficiency before it becomes expensive.
Common Hooping Mistakes and Their Likely Effects
Several errors appear repeatedly because they initially look reasonable.
Pulling Fabric After Hooping
The surface becomes flatter, but the grain or stretch structure can be distorted. Puckering may appear when the fabric is released.
Using Too Little Stabilizer
The fabric moves as stitches accumulate, potentially causing distortion, poor registration, or puckering.
Cutting Stabilizer Too Small
The hoop grips fabric while failing to capture enough of the support layer, weakening the entire setup.
Hooping Over Wrinkles
The wrinkle becomes mechanically locked into the embroidery area.
Ignoring Grain or Garment Alignment
The design may stitch perfectly while appearing crooked relative to the finished item.
Choosing an Unnecessarily Large Hoop
More fabric may remain unsupported within the sewing field, and alignment can become harder.
Failing to Check the Back
Extra garment layers can be sewn into the embroidery.
Skipping the Trace Function
Placement or clearance errors remain invisible until stitching begins.
Forcing Thick Material Between Hoop Rings
The hoop may not hold correctly, the material may be damaged, or the machine may encounter clearance problems. Floating or a specialized frame may be more appropriate.
How Tight Should Machine Embroidery Fabric Actually Be?
This question causes more confusion than almost any other part of hooping.
The correct answer is best expressed in behavioral terms.
The fabric should not slide or wrinkle during embroidery. The stabilizer should be securely captured. The fabric surface should be smooth. Yet the fabric should not be elongated, warped, or pulled away from its natural grain.
A woven fabric’s straight grain should remain straight.
A knit should not be visibly expanded.
A design-center cross should remain perpendicular rather than bowing outward.
The hoop should hold the material; it should not reshape it.
That standard is more reliable than attempting to imitate an arbitrary sound or tactile sensation.
A Repeatable Hooping Routine
Consistency improves results more effectively than improvising on every project.
A disciplined routine can look like this:
- Confirm the design dimensions.
- Select the smallest suitable hoop.
- Press and prepare the fabric.
- Determine the finished design position.
- Mark horizontal and vertical centerlines.
- Select stabilizer for the fabric and stitch density.
- Cut stabilizer larger than the hoop.
- Loosen the outer hoop appropriately.
- Work on a hard, flat surface.
- Align stabilizer and fabric.
- Insert the inner frame using even pressure.
- Tighten the screw without stretching the material.
- Inspect the front and back.
- Attach the hoop while supporting heavy fabric.
- Clear excess material from the embroidery field.
- Trace the design boundary.
- Stitch a test when the material or project warrants it.
- Begin embroidery only after placement and movement have been verified.
That sequence turns hooping from guesswork into a controlled preparation process.
Final Considerations
Machine embroidery is often discussed as though stitch quality comes primarily from the machine.
The machine matters, but embroidery begins with material control.
The hoop determines how securely the fabric enters the process. Stabilizer determines how well the material withstands repeated needle penetration and directional movement. Placement marks determine whether the design lands where intended. Grain alignment determines whether an otherwise perfect motif looks straight on the finished object.
Good hooping is therefore less about strength than restraint.
Fabric should be controlled without being bullied.
A woven should retain its grain. A knit should retain its relaxed dimensions. A textured fabric should not be crushed merely because it can physically fit between two rings. Stabilizer should support the stitches rather than act as an afterthought.
When conventional hooping cannot achieve those conditions, floating provides another method. When texture threatens to swallow stitches, topping addresses the upper surface. When a design is dense, stabilization must respond to the extra mechanical stress. When placement matters, tracing should precede the first permanent stitch.
The signs of correct hooping are quiet ones: the fabric stays flat, the hoop travels freely, the design remains aligned, and the material returns from the machine without a distorted perimeter around the embroidery.
That is the standard worth pursuing.
Not fabric pulled as tight as possible, but fabric held exactly as firmly as the embroidery requires.