Repeated embroidery-thread breakage rarely comes from one mysterious defect. More often, the machine is exposing a small mismatch somewhere in a system that asks thread to travel from a spool, through guides and tension devices, through a needle eye, into fabric, around a fast-moving hook, and back out again hundreds of times per minute.
Every part of that path matters.
A thread can snap because it was threaded incorrectly, pulled too tightly, damaged by a needle, scraped over a burr, trapped beneath a spool cap, dragged through adhesive residue, forced through dense stitching, or subjected to more speed than the combination of thread, needle, fabric, and design will tolerate. A dirty bobbin case can create its own problems. Poor digitizing can make a perfectly healthy machine look mechanically defective.
The efficient response is therefore not to change every setting.
It is to diagnose the break in a controlled order.
Brother’s upper-thread troubleshooting guidance starts with basic checks: correct threading, knots or tangles, excessive upper tension, needle condition, damaged machine surfaces, and the suitability of the needle-thread-fabric combination. That sequence is useful because it begins with reversible problems before moving toward machine repair.
The same logic works across many home and commercial embroidery systems.
First, Identify What “Breaking” Actually Looks Like
Not every failed thread has failed in the same way.
A clean snap is different from progressive shredding.
If the thread breaks abruptly and still looks relatively intact near the broken end, excessive tension, snagging, spool resistance, threading errors, or sudden mechanical interference become likely suspects.
If the thread becomes fuzzy, separates into filaments, or looks abraded before failing, friction deserves closer attention. The needle eye, needle plate, embroidery foot, hook area, guides, and other contact surfaces can all damage thread gradually.
Madeira’s thread-break troubleshooting guidance distinguishes between breaks and fraying in much the same way: breaks are commonly associated with tension, thread-path interference, aging thread, or digitizing, while fraying more often points toward nicks and burrs in the thread path.
That distinction immediately narrows the investigation.
Before changing anything, examine the failed thread.
Look at:
- whether the end is clean or fuzzy;
- whether individual filaments have separated;
- whether the same color keeps failing;
- whether the break happens at roughly the same design location;
- whether failures begin only during dense areas;
- whether one needle fails while others run normally on a multineedle machine;
- whether the thread snaps immediately or only after several minutes.
Patterns are diagnostic evidence.
Step 1: Rethread the Upper Thread Completely
The fastest useful intervention is also the simplest: remove the upper thread and rethread the machine from the beginning.
Do not merely inspect the visible path.
A thread can miss a guide while appearing normal from the front. It can fail to enter the take-up lever. It can sit incorrectly in a tension device. It can become wrapped around a spool pin or trapped beneath a cap.
Brother specifically advises rethreading from the beginning when upper thread repeatedly breaks. The company’s guidance also tells users to inspect the spool for knots and tangles.
On machines where raising the presser foot opens the tension discs, rethread with the presser foot in the position specified by the manual. Threading with the tension system closed can prevent the thread from seating correctly.
Then confirm that the thread actually entered every guide.
Pay particular attention to:
- the first guide above or near the spool;
- pretension guides;
- tension discs;
- check-spring areas;
- take-up lever;
- final guides immediately above the needle.
A machine can sometimes sew for a short period despite incorrect threading. That delay can make the eventual break seem unrelated.
Step 2: Inspect How the Thread Leaves the Spool
A correctly threaded machine can still break thread if the spool itself cannot unwind smoothly.
Watch the spool while the machine runs at low speed.
The thread should leave without jerking, snagging, wrapping around the spindle, or catching beneath the spool cap.
Check whether:
- the spool is installed in the orientation specified by the machine manufacturer;
- the spool cap fits correctly;
- the thread is catching in a notch on the spool;
- the cone requires a stand rather than a horizontal pin;
- a thread net is constricting the spool too much;
- the thread has fallen beneath the spool;
- the spool has crossed or tangled windings.
This problem can be intermittent. A thread may feed normally for hundreds of stitches before reaching a loose winding or snag.
Specialty threads deserve extra scrutiny. Metallic and slippery threads can unwind differently from conventional embroidery polyester or rayon.
Brother notes in some model-specific troubleshooting instructions that metallic or transparent nylon thread may require a spool net, while also warning that a net can increase effective tension.
Any device added to control thread should therefore be judged by actual feed behavior rather than used automatically.
Step 3: Replace the Needle Before Adjusting the Machine
A needle is inexpensive, easy to change, and directly involved in every stitch.
That makes it one of the first components worth eliminating as a cause.
A needle does not have to look damaged to harm thread.
Its point may be worn. The eye may have developed microscopic damage. The needle may be slightly bent. The wrong needle size may place excessive friction on the thread. A needle installed incorrectly can also alter the relationship between the needle and hook.
SCHMETZ advises replacing sewing-machine needles after approximately eight hours of use in its needle troubleshooting guide, while also listing damaged or old needles and needles that are too small among causes of upper-thread breakage.
The exact useful life varies with material and workload, but the diagnostic lesson is straightforward: a fresh needle removes one major variable at very little cost.
Install it fully and in the correct orientation.
Then retest before changing tension.
Step 4: Match Needle Size to Thread Size
Embroidery thread must pass through the needle eye rapidly and repeatedly.
If the eye is too small relative to the thread, friction increases.
SCHMETZ’s thread-sizing guidance advises that the needle eye should be about 40 percent larger than the thread diameter and identifies 40-weight thread as a typical match for a size 75/11 needle. The company also advises considering a larger needle when using heavier thread.
That relationship explains why changing thread weight without reconsidering the needle can produce sudden failures.
A thicker thread forced through a small eye can rub continuously along the metal.
The effect becomes more pronounced at high machine speed.
Embroidery-specific needles address this partly through geometry. SCHMETZ describes its embroidery needle as having an enlarged eye and wider groove intended to reduce friction on fast-moving embroidery thread.
The practical test is not simply whether the thread physically fits through the eye.
It must travel through that eye repeatedly without excessive abrasion.
Step 5: Check Whether Upper Tension Is Too Tight
If rethreading and a fresh needle do not solve the problem, inspect tension.
Thread tension controls how strongly the upper thread is restrained as the stitch forms.
Too little tension can cause looping and unstable stitches. Too much tension increases the force applied to the thread and can cause repeated breakage.
Madeira states in its embroidery tension guidance that excessive upper tension can produce frequent thread breaks and that bobbin tension should be established before upper tensions are managed on commercial-style systems.
Do not respond to every break by dramatically lowering the tension dial.
Make small adjustments.
Test a simple design or satin column and examine both sides of the embroidery.
If the machine stitched normally before the current project, ask what changed before altering established tension settings. A new thread, different needle, dense design, adhesive stabilizer, damaged surface, or unusual fabric may be creating the problem instead.
Tension should be adjusted because evidence points toward tension, not because the dial is easy to reach.
Step 6: Check the Bobbin System
Upper-thread breaks can originate from problems below the fabric.
Remove the bobbin according to the machine instructions.
Inspect:
- whether the bobbin is the correct type;
- whether it is installed in the correct direction;
- whether thread feeds smoothly;
- whether lint is packed beneath the bobbin-case tension spring;
- whether the case contains scratches or burrs;
- whether the bobbin is warped;
- whether the bobbin area contains loose thread fragments.
Brother specifically includes damaged bobbin cases and incorrect bobbins among possible causes of repeated upper-thread breakage.
A rough bobbin case can abrade thread. Packed lint can alter tension. An incorrect bobbin can change how the thread feeds.
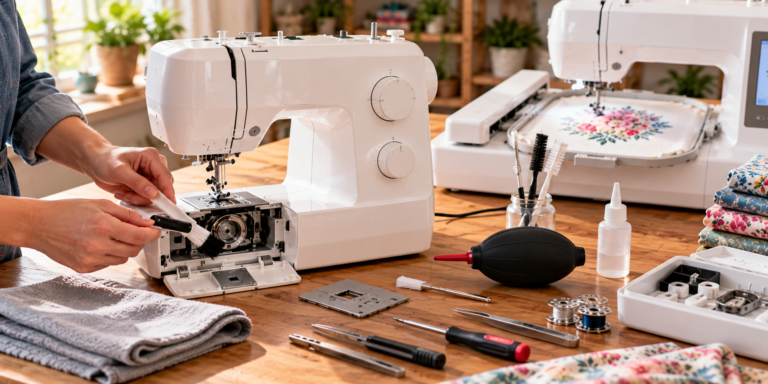
Cleaning therefore belongs in troubleshooting, not merely scheduled maintenance.
Step 7: Search for Burrs Along the Entire Thread Path
When thread frays before breaking, a rough surface becomes a leading suspect.
A needle strike can leave a tiny burr on a needle plate.
A damaged embroidery foot can develop a rough edge.
A hook or bobbin case can become scratched.
A thread guide can have a sharp defect.
The damage may be extremely small. Thread moving quickly over the same rough spot thousands of times does not need a large obstruction to fail.
Brother advises checking the embroidery foot and bobbin case for scratches when upper thread repeatedly breaks.
Madeira similarly recommends checking the rotary-hook region and throat plate for nicks or rough areas when diagnosing fraying.
A useful clue is consistency.
If one thread color breaks regardless of design position, examine its particular needle and thread path on a multineedle machine.
If every color breaks at the same physical stitching location, look harder at the design, fabric, hooping, or needle interaction.
If all colors fray unpredictably, inspect shared mechanical surfaces.
Step 8: Examine the Thread Itself
Thread is not automatically innocent because it came from a sealed package.
Inspect the spool for knots, irregular winding, contamination, visible fuzziness, or brittle sections.
Storage conditions also matter.
Thread exposed for long periods to heat, strong light, dust, or unsuitable humidity can behave differently from thread stored cleanly and consistently.
An easy diagnostic experiment is to replace the failing spool with another known-good spool of similar type and weight.
If the machine immediately begins sewing normally, attention shifts away from the machine.
If the new thread fails in the same manner, the investigation continues.
Avoid testing with a completely different thread class if the objective is controlled diagnosis. Changing from ordinary polyester embroidery thread to metallic thread, for example, adds several new variables rather than removing one.
Step 9: Remove Adhesive Residue From the Equation
Sticky needles can shred embroidery thread.
Adhesive-backed stabilizers, temporary spray adhesives, fusible products, and sticky placement systems can transfer residue to the needle.
As the needle repeatedly passes through the material, residue can accumulate along the blade and near the eye.
That changes friction.
Madeira specifically identifies adhesive and glue buildup on needles as a possible contributor to thread breaks and advises allowing suitable adhesives to dry adequately before embroidery.
When breaks start after changing to an adhesive-backed setup, inspect the needle.
Replacing the needle is often more efficient than trying to preserve a heavily contaminated one.
The stabilizer should also be appropriate for machine embroidery rather than an improvised adhesive material whose behavior under repeated needle penetration is unknown.
Step 10: Reduce Speed as a Diagnostic Test
Maximum machine speed is not mandatory machine speed.
If thread breaks appear during dense designs, small lettering, metallic-thread work, thick materials, or rapid direction changes, reduce the embroidery speed and retest.
Madeira lists excessive machine speed among possible causes of thread breaks.
Slower operation reduces how rapidly thread accelerates through guides and the needle eye. It also gives the stitch-forming mechanism more time during difficult material penetration.
A large speed reduction should not be treated as the permanent answer to every machine problem.
If ordinary 40-weight embroidery thread breaks constantly on simple cotton at moderate settings, slowing the machine may merely hide another defect.
Use speed reduction as a diagnostic tool.
If the break disappears only when speed falls substantially, inspect thread type, needle size, fabric resistance, stitch density, and thread-path friction next.
Step 11: Examine Whether the Design Is Too Dense
Sometimes the machine is being asked to sew a design that is mechanically hostile to thread.
Dense fill areas can place many stitches into the same region. Overlapping objects may stack additional layers on top. Short stitches can force rapid changes in direction. Poor sequencing can cause repeated penetration through already dense embroidery.
Madeira’s embroidery FAQ advises reducing stitch density when excessive density or stacked stitching contributes to thread breakage.
This diagnosis becomes likely when:
- thread always breaks in the same section of the same design;
- other designs run successfully;
- breakage begins where several filled elements overlap;
- the fabric becomes unusually stiff;
- the needle produces a harsh punching sound;
- thread problems appear only after substantial stitching has accumulated.
Changing machine tension cannot repair badly constructed embroidery data.
If the design is the variable, edit or redigitize the design.
Step 12: Check Hooping and Stabilization
Poor fabric control can also stress thread.
Material that moves excessively can alter how the needle enters and exits the fabric. Very loose hooping may allow the embroidered area to shift. Excessively stretched fabric can create other forms of distortion.
Madeira identifies both overly loose and overly tight hooping among possible contributors to thread problems.
The stabilizer must also suit the material and design density.
If fabric is flexing, bouncing, or being dragged around the needle excessively, the embroidery system is no longer operating under stable conditions.
Inspect whether:
- the fabric is secure but not artificially stretched;
- the stabilizer adequately supports the stitch load;
- the hoop is attached correctly;
- heavy garment sections are not pulling on the frame;
- nothing catches the hoop during movement.
The best sewing and embroidery machines still require stable material presentation. Machine precision cannot compensate for fabric moving unpredictably underneath the needle.
Step 13: Consider Fabric Resistance
Some fabrics are simply harder to penetrate.
Dense woven material, multiple seam layers, coated textiles, thick stabilizer stacks, and heavily embroidered regions increase the resistance encountered by the needle.
The thread experiences the consequences.
If breakage occurs only when crossing a thick seam or dense intersection, the machine may not have a general thread problem at all.
Try:
- a fresh needle appropriate to the material;
- a slightly different needle size where permitted;
- reduced speed;
- improved stabilization;
- a revised design that avoids unnecessary stitch stacking.
Do not keep increasing needle size indefinitely. A larger needle leaves a larger hole and may damage delicate fabric.
Needle selection should balance thread clearance with fabric requirements.
Step 14: Treat Metallic and Specialty Thread Differently
Metallic thread is not simply ordinary embroidery thread with a shiny surface.
Its construction can make it more sensitive to friction, bending, thread-path geometry, and speed.
SCHMETZ notes that larger needle eyes reduce thread friction and specifically identifies elongated-eye needle designs for metallic thread. Its discussion of needle-eye geometry explains that larger eyes reduce friction as thread passes through the needle.
When specialty thread breaks repeatedly:
- verify the recommended needle type;
- inspect spool delivery;
- lower speed;
- reduce excessive tension;
- make sure the thread is not twisting excessively;
- inspect every contact point for roughness.
A machine that handles conventional embroidery polyester flawlessly can still require different settings for metallic or other specialty thread.
That does not necessarily indicate a machine defect.
Step 15: Determine Whether One Needle or All Needles Are Affected
Multineedle embroidery machines offer an especially useful diagnostic clue.
If only needle number four breaks thread while all other needles run correctly, the problem is probably local to that needle position.
Possible causes include:
- damaged needle;
- incorrect needle installation;
- thread-guide damage;
- local tension setting;
- spool-delivery problem;
- burr in that thread path.
Swap controlled variables one at a time.
A fresh needle is first.
Then, where the machine design and operating instructions permit, test whether the same thread behaves correctly on another needle position.
If the problem follows the thread, inspect thread and spool delivery.
If the problem remains with the needle position, inspect that pathway.
That method prevents an entire machine from being adjusted to solve one local defect.
Step 16: Do Not Keep Restarting at the Exact Broken Stitch
Once the cause has been corrected, embroidery must resume carefully.
If the machine restarts exactly after the failed stitch, a visible gap may remain.
Brother’s instructions for recovering from a thread break advise moving backward to stitches before the break and then resuming embroidery.
The precise recovery controls differ by machine, but the principle is widely useful.
Back up enough stitches to overlap the repaired area securely without creating a conspicuous dense lump.
Then watch the machine through the section where the original break occurred.
If the thread breaks again in exactly the same location after rethreading and installing a fresh needle, the design or material interaction deserves much greater suspicion.
Step 17: Know When Tension Adjustments Have Gone Too Far
Repeated troubleshooting can create secondary problems.
An operator lowers top tension because thread breaks.
Then lowers it again.
Then changes bobbin tension.
Then changes both once more.
Eventually, the machine has several altered variables and no reliable baseline.
Avoid that spiral.
Change one major factor at a time and record what happened.
A controlled sequence might be:
- Rethread completely.
- Replace the needle.
- Check spool delivery.
- Clean and inspect the bobbin area.
- Inspect for burrs.
- Test with known-good thread.
- Make a small tension adjustment if evidence supports it.
- Reduce speed.
- Test another design.
- Escalate to mechanical inspection or service if failures remain.
That order preserves diagnostic information.
Step 18: Recognize When the Machine Needs Service
Thread breakage is not always a user-setting problem.
Professional inspection becomes reasonable when:
- several known-good threads break repeatedly;
- fresh correct needles do not help;
- simple designs fail on ordinary fabric;
- the thread path and bobbin system are clean;
- tension changes produce no meaningful improvement;
- the hook or other internal surfaces appear damaged;
- needles strike the plate or hook;
- the machine makes abnormal mechanical noises;
- failures began after a jam, collision, or broken needle;
- timing is suspected.
Hook timing and needle depth are precision adjustments.
Madeira includes incorrect needle depth among possible causes of persistent thread failure and advises consulting machine documentation or a technician when appropriate.
Once timing or internal alignment enters the diagnosis, random screw adjustments can convert a manageable service issue into a larger repair.
A Fast Diagnostic Sequence for Repeated Thread Breaks
When embroidery stops repeatedly, the following order eliminates common causes efficiently:
- Stop the machine and inspect the broken thread.
- Rethread the upper path completely.
- Check the spool for snags, knots, and incorrect caps.
- Install a fresh needle of the correct type and size.
- Clean the bobbin and hook area.
- Confirm the correct bobbin is installed properly.
- Inspect the bobbin case, needle plate, and embroidery foot for burrs.
- Test a known-good spool of embroidery thread.
- Check whether upper tension is excessive.
- Reduce embroidery speed.
- Inspect hooping and stabilization.
- Determine whether the break repeats at the same design location.
- Test a simpler design on comparable fabric.
- Seek service if normal thread, a fresh needle, correct threading, clean mechanisms, and a simple design still produce repeated failures.
This approach avoids replacing several variables simultaneously.
What the Break Location Can Reveal
The timing of the failure can shorten the investigation considerably.
Breaks Immediately After Starting
Check threading, needle installation, spool delivery, and tension first.
Breaks After Several Minutes
Inspect spool snagging, thread quality, heat, progressive abrasion, and needle wear.
Breaks at the Same Stitch Every Time
Suspect excessive density, short stitches, overlapping objects, fabric thickness, or another design-specific condition.
Breaks Only on One Color
Inspect that spool, thread, needle, and thread path.
Breaks Only With Metallic Thread
Check needle-eye size, thread delivery, speed, and tension.
Thread Frays Before Snapping
Inspect the needle eye, plate, foot, hook, bobbin case, and guides for abrasive surfaces.
Breaks Begin After Using Adhesive Stabilizer
Inspect the needle for residue and replace it if contamination is evident.
That pattern-based approach is faster than treating every thread break as identical.
Final Considerations
Embroidery thread does not break because machines are inherently temperamental.
It breaks when the forces acting on the thread exceed what that particular thread can tolerate at some point along its path.
The job of troubleshooting is to find where that excess load begins.
Often the answer is simple: incorrect threading, an old needle, a spool snag, lint in the bobbin system, or tension set too tightly.
Sometimes the fault is less visible. A microscopic burr can gradually shave fibers from the thread. An undersized needle eye can generate repeated friction. Adhesive can coat the needle. A poorly digitized design can force thousands of stitches into an area that the fabric and thread cannot handle reliably.
That is why random adjustment is inefficient.
The better method is controlled elimination.
Rethread first. Replace the needle. Watch the spool. Clean the bobbin area. Inspect every surface the thread touches. Confirm that thread and needle sizes make sense together. Alter tension cautiously. Reduce speed when the material or thread demands it. Examine the design when failures repeat in the same location.
Patterns matter.
A failure tied to one needle is different from one affecting every needle. A break tied to one design section tells a different story from random failures across several projects. Fraying points toward abrasion; sudden snapping more often sends attention toward tension, snagging, or thread delivery.
A machine that repeatedly breaks thread is therefore providing information, even if the message initially looks like a broken strand hanging from the needle.
Read that information systematically and many apparent machine faults can be corrected without deep adjustment.
When correct threading, fresh needles, suitable thread, clean mechanisms, appropriate tension, stable hooping, moderate speed, and sound embroidery data still fail to solve the problem, mechanical service becomes the rational next step.
Until that point, every unnecessary adjustment merely creates another variable.
Good troubleshooting does the opposite: it removes variables until the cause has nowhere left to hide.