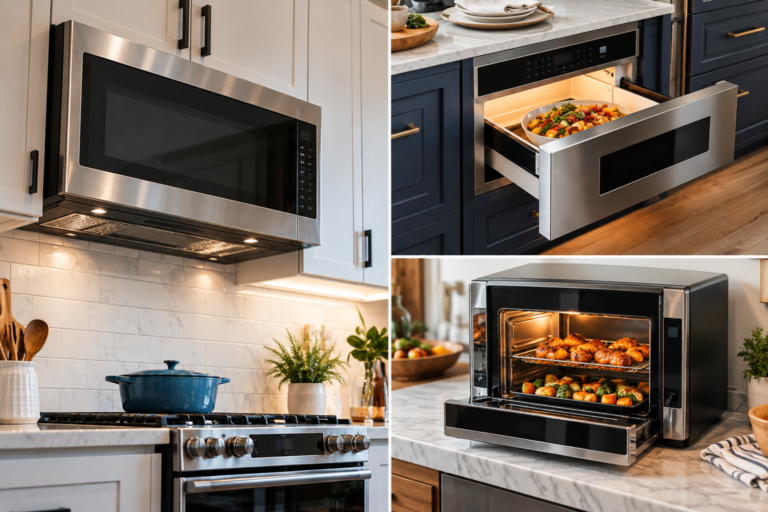
Measuring for a built-in microwave looks deceptively easy. There is a rectangular cabinet opening, a rectangular appliance and a tape measure. Three measurements – width, height and depth – would seem to settle the matter.
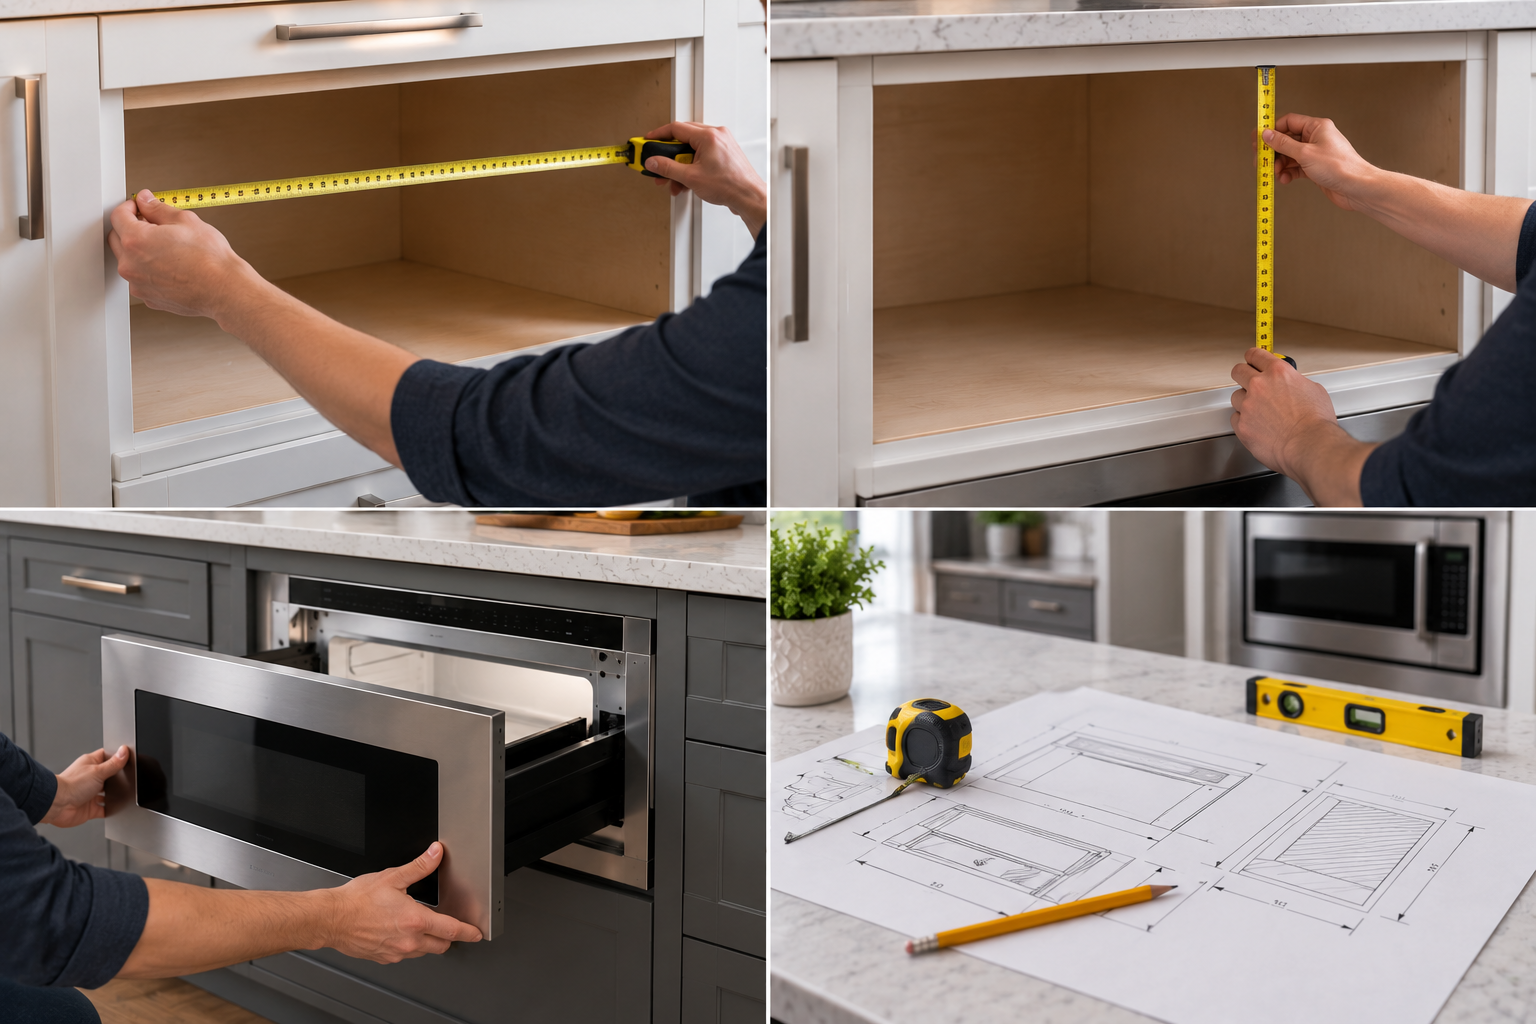
They do not.
Built-in microwave installation involves several overlapping dimensions: the appliance body, required cabinet cutout, visible trim, ventilation space, electrical receptacle, mounting hardware and clearance needed for the door or drawer to move. A cabinet can be wider than a microwave and still be incompatible with it. A cavity can appear deep enough until the electrical plug consumes space behind the appliance. An existing trim frame can cover a large opening while concealing a much smaller cutout.
Microwave drawers introduce another set of variables. They move forward into the room, need structural support and may require anti-tip provisions. Their installation height also affects how comfortably users can load cookware and see the controls.
The reliable method is therefore not to measure the old appliance and buy another one with similar advertised dimensions. The cabinet opening has to be documented, then compared with the installation requirements for the exact replacement model.
That difference – appliance dimensions versus installation dimensions – is where a serious microwave buying guide should begin.
Step 1: Identify What Type of Microwave Is Actually Being Installed
Before measuring anything, establish the installation category.
A built-in microwave can mean several different things:
- A microwave manufactured specifically for built-in installation.
- A countertop microwave approved for built-in use with a model-specific trim kit.
- A microwave drawer installed in base cabinetry or an island.
- A microwave installed above or adjacent to another built-in appliance.
These configurations are not interchangeable.
GE Appliances explains that only selected countertop microwave models can be converted to a built-in installation and that an appropriate model-specific trim kit is required. The trim kit provides both the finished frame and airflow needed around compatible countertop microwaves.
That airflow function deserves attention. A trim kit is not merely decorative molding around a countertop microwave. GE explains that enclosing a countertop unit without its approved kit can obstruct case vents, potentially causing overheating and shutdown.
Whirlpool makes the same broader point in its guidance: trim kits are generally designed for specific microwave models and their ventilation requirements.
The first measurement, in other words, is conceptual. Determine exactly what kind of appliance the cabinet is expected to receive.
Step 2: Find the Installation Instructions Before Buying
The manufacturer’s installation document should be obtained before the appliance is ordered, not after it arrives.
This reverses the sequence many buyers instinctively follow.
Retail product pages commonly emphasize overall width, capacity and wattage. Cabinetmakers and installers need a different set of numbers: required cutout width, cutout height, minimum depth, clearances, receptacle position and mounting requirements.
These dimensions can be surprisingly exact.
One Whirlpool built-in trim-kit installation document, for example, specifies a cabinet-opening height between 17 inches and 17 1/8 inches and gives the width measurement a tolerance of ±1/16 inch. The same instructions change minimum required depth according to where the receptacle sits and whether that receptacle is flush-mounted.
That example should not be copied onto another microwave. It demonstrates why generic measurements are unreliable.
The correct sequence is:
- Identify the exact microwave model.
- Identify the exact trim kit, if one is required.
- Download the manufacturer’s current installation instructions.
- Locate the required cutout diagram.
- Measure the actual cabinet against that diagram.
Only then is there enough information for a meaningful fit assessment.
Step 3: Measure the Cabinet Opening, Not the Cabinet Door
Cabinet terminology creates avoidable confusion.
A nominal 24-inch, 27-inch or 30-inch cabinet does not necessarily contain an opening of that width. Cabinet sides, face frames and trim consume space.
Measure the actual finished opening where the appliance will enter.
Start with width.
Place the tape measure horizontally between the finished left and right surfaces of the opening. Measure at the top, middle and bottom.
Why three measurements?
Cabinet openings are not always perfectly square. Older cabinetry can shift. Face frames may vary slightly. Remodel work can introduce small discrepancies that are invisible until a rigid appliance is inserted.
Record all three figures rather than averaging them.
For fit purposes, the smallest usable width is usually the measurement that deserves attention, subject to the manufacturer’s installation instructions.
Do not round a measurement upward because it is close to a nominal cabinet size. If the tape reads 28 7/16 inches, record 28 7/16 inches.
Precision is cheaper than cabinet reconstruction.
Step 4: Measure Opening Height in Several Places
Height deserves the same discipline.
Measure vertically from the finished cabinet floor to the finished upper surface at the left side, center and right side.
Again, record the smallest dimension.
This matters because some trim-kit installations allow surprisingly little variation. A seemingly insignificant fraction of an inch can interfere with the mounting frame or prevent the microwave from aligning correctly.
Whirlpool’s published instructions for one trim-kit system specify a 1/16-inch tolerance for cabinet-opening width and height. That figure is model-specific, but it illustrates how different built-in appliance measurement is from simply finding a microwave that appears approximately the right size.
Also determine whether the cabinet floor is truly level.
A microwave resting on a sloping or distorted surface can create alignment problems at the visible trim frame. A drawer mechanism is even less forgiving because its moving front needs to align with adjacent cabinetry.
The opening should be measured as a three-dimensional installation space, not as a decorative rectangle viewed from the front.
Step 5: Measure Usable Depth, Not Just Cabinet Depth
Depth produces some of the most expensive measurement mistakes.
Measure from the front installation plane specified by the manufacturer to the usable rear boundary of the cabinet.
Then inspect what exists inside that depth.
A receptacle protruding from the back wall consumes space. So can a plug, cord bend, conduit, cabinet back panel or other obstruction.
This is why a cabinet that measures 22 inches deep does not necessarily provide 22 inches of usable appliance depth.
Whirlpool’s installation instructions provide a useful example. In one trim-kit configuration, minimum depth changes depending on whether the receptacle is flush and whether it sits inside the recommended region. The instructions specify 20 inches with a flush receptacle in the recommended area but as much as 24 inches with a non-flush receptacle outside that region.
Those numbers apply to that installation, not every microwave. Their significance is broader: electrical hardware has physical dimensions.
A tape measure cannot stop at the back wall and pretend the plug does not exist.
Step 6: Locate the Electrical Receptacle
Once the cabinet dimensions are known, document the receptacle.
Measure its location from fixed cabinet references, such as the left side, cabinet floor and rear wall.
Then compare that location with the appliance installation diagram.
A receptacle in the wrong place can create several problems. The microwave may not slide fully backward. The cord may not reach. The plug may collide with the appliance housing. Required airflow or mounting hardware can also be affected.
Some installation documents specify a recommended receptacle region for precisely this reason.
Electrical work should not be improvised simply to make an appliance fit. The appliance’s electrical requirements and applicable local rules need to be followed, with qualified electrical work used where required.
From a measurement standpoint, the lesson is simple: electricity occupies physical space.
The receptacle belongs on the measurement sheet.
Step 7: Distinguish Cutout Size From Trim Size
This distinction causes considerable confusion during replacement projects.
A visible microwave frame may be 27 or 30 inches wide while the cabinet opening behind it is substantially narrower.
GE explains that its 27-inch and 30-inch trim-kit designations refer to the outside trim-frame width, while the microwave and associated ducting can use a different cabinet cutout. When replacing a built-in countertop microwave, GE advises checking both the new model’s required cutout and whether the existing trim kit is actually compatible.
Therefore, measuring only the visible trim frame is inadequate.
Remove the old trim when safe and practical, or consult its installation documentation, and record the actual opening behind it.
For a replacement project, document at least:
- Existing trim-frame width and height.
- Actual cabinet cutout width.
- Actual cabinet cutout height.
- Usable depth.
- Receptacle position.
- Distance to nearby cabinet doors and drawers.
- Model number of the existing microwave.
- Part number of the existing trim kit, if available.
An old trim kit should not be assumed compatible with a new microwave simply because both appliances are nominally the same width.
Step 8: Treat a Microwave Drawer as a Moving Appliance
Microwave drawers require another measurement: operating space in front.
A drawer does not merely sit inside cabinetry. It projects outward during use.
Measure from the appliance face into the room and check the manufacturer’s specified drawer extension. Then inspect the surrounding area.
Look for:
- Opposing cabinet runs.
- Island seating.
- Dishwasher doors.
- Oven doors.
- Cabinet handles.
- Walkways.
- Adjacent drawers.
- Structural columns or walls.
A drawer that physically fits the cabinet but conflicts with another appliance when open is not a successful fit.
The same applies to handles. Two appliance fronts can look comfortably separated when closed yet collide once one begins moving.
The installation drawing should therefore be considered in both states: closed and fully open.
This is especially relevant in islands, where microwave drawers are frequently positioned near seating or circulation routes.
Step 9: Check Structural Support and Anti-Tip Requirements
Microwave drawers are heavier and mechanically different from small countertop appliances. The cabinet floor and surrounding structure need to satisfy the manufacturer’s requirements.
Some drawer installation instructions specify a minimum support capacity and require an anti-tip block or similar provision.
These requirements should be confirmed before cabinetry is fabricated.
The anti-tip component deserves particular attention because it can require space at a specific position behind or above the appliance. A cabinetmaker who knows only the outside microwave dimensions can inadvertently build a cavity that lacks the necessary mounting geometry.
This is another reason the manufacturer’s installation drawing should travel with the cabinet plans.
The installer should not have to discover structural requirements after finished cabinetry arrives.
Step 10: Measure the Landing Area
Fit is only part of successful installation. The microwave also needs to function within the kitchen.
Hot cookware needs somewhere to go.
The National Kitchen & Bath Association recommends at least 15 inches of landing area above, below or adjacent to the handle side of a microwave oven. Its accessibility guidance recommends landing area in front of or immediately adjacent to the handle side.
That recommendation can materially affect where a drawer or built-in microwave belongs.
A microwave drawer installed beneath an island worktop can provide a short transfer from cavity to counter. A built-in microwave placed in a tall cabinet at the edge of the kitchen may require carrying a hot casserole farther before reaching a suitable surface.
Measure the workflow, not merely the opening.
A technically perfect cutout can still produce an inconvenient kitchen.
Step 11: Test Installation Height Against Actual Users
The tape measure should eventually leave the cabinet and turn toward the people who will use the appliance.
Installation height changes interaction.
A conventional built-in microwave installed too high can require uncomfortable lifting of hot dishes. A drawer positioned very low can require more bending than expected. Controls may also be difficult to see from some positions.
Before finalizing the cabinet design, simulate the proposed height.
Mark the microwave’s lower and upper edges on the cabinet with removable tape. Stand where the user would stand. Mimic loading a large dish. Check whether the control location can be seen comfortably.
For a drawer, simulate lowering a casserole into the cavity.
For a conventional built-in microwave, simulate lifting that same dish into the opening and removing it while hot.
These movements reveal information that a dimensioned elevation drawing cannot.
Ergonomics is physical.
Step 12: Check Door Swing on Conventional Built-In Models
A front-opening built-in microwave introduces clearance requirements different from those of a drawer.
Determine which side the door hinges from and how far it opens.
Then examine adjacent walls, cabinet handles and appliance fronts.
A microwave can fit perfectly into a cutout while its door strikes a projecting handle or nearby wall before reaching a useful opening angle.
Corner installations deserve particular scrutiny.
Measure the distance from the microwave face to the adjacent perpendicular wall or cabinet. Compare it with the manufacturer’s clearance instructions.
Do not assume a flush-looking front guarantees unrestricted door movement.
The appliance must work after it fits.
Step 13: Confirm Ventilation Requirements
Ventilation is not empty space left over after measuring. It is part of the installation specification.
Countertop microwaves converted to built-in installations can be especially sensitive to this distinction.
Whirlpool explains that compatible trim kits frame and secure the microwave while accommodating model-specific ventilation requirements.
That is why improvising decorative trim around an ordinary countertop microwave can be problematic.
The manufacturer’s clearances, ducts and trim components create an airflow arrangement intended for that appliance.
When measuring, record any specified space above, below, behind or beside the microwave. Do not subtract those clearances because the cabinet appears large enough to hold the appliance body.
The empty space may be there for a reason.
Step 14: Measure for Replacement Differently Than for New Construction
New cabinetry and replacement installations present opposite problems.
In new construction, the appliance specification can define the cabinet.
In a replacement, the cabinet already defines the available space.
That makes replacement more restrictive.
Before removing an old built-in microwave, photograph the installation. Record the model number and trim-kit information. After removal, measure the opening directly.
Do not rely on the dimensions of the old appliance as a substitute.
Two microwaves with similar external dimensions can require different cutouts, trim kits or ventilation arrangements.
Replacement shopping should therefore begin with the existing cavity and installation documentation rather than with brand loyalty or appearance.
The cabinet is the fixed asset. The appliance is the variable.
Step 15: Create a Measurement Record Before Ordering
Measurements written on scraps of paper have a remarkable ability to disappear exactly when needed.
Create a permanent record.
A useful measurement sheet should include:
- Opening width at top, middle and bottom.
- Opening height at left, center and right.
- Minimum usable depth.
- Cabinet floor depth.
- Receptacle dimensions and position.
- Distance to adjacent walls.
- Distance to nearby appliance fronts.
- Available door or drawer operating space.
- Landing-area dimensions.
- Cabinet material and structural details relevant to mounting.
- Existing trim-kit dimensions for replacement projects.
- Photographs showing the opening from front, side and rear.
- Exact model number being considered.
- Exact trim-kit or accessory number.
- Date the measurements were taken.
Use fractions of an inch or millimeters consistently rather than casually switching between systems.
Photograph the tape measure in position for critical dimensions. This creates a visual record that can be shared with an installer or cabinetmaker.
A ten-minute documentation exercise can prevent arguments later about whether a dimension was 22 1/8 inches or 22 7/8 inches.
Step 16: Compare the Numbers Line by Line
Once the cabinet measurements and installation document are available, perform a direct comparison.
Do not rely on memory.
Create two columns: manufacturer requirement and measured opening.
Compare width first, then height, depth, receptacle location, clearances and structural requirements.
If the manufacturer gives a range, confirm that the actual measurement falls inside it.
If the specification gives a minimum, do not treat a smaller dimension as close enough.
If a maximum is stated, respect that too. An oversized opening can create mounting or trim problems just as an undersized opening can.
The objective is not to prove that the appliance can somehow be squeezed into the cabinet.
The objective is to establish that the cabinet matches the installation for which the appliance was engineered.
Common Measuring Mistakes
Several errors appear repeatedly because they seem reasonable at first.
Measuring the appliance instead of the cutout is one. Measuring only the visible trim is another.
Other mistakes include:
- Taking width at only one point.
- Ignoring an out-of-square opening.
- Measuring depth without accounting for the plug.
- Assuming a nominal 30-inch cabinet has a 30-inch opening.
- Reusing an old trim kit without checking compatibility.
- Ignoring ventilation space.
- Forgetting drawer extension.
- Failing to check adjacent handles.
- Treating electrical placement as somebody else’s problem.
- Ignoring landing space.
- Choosing installation height from drawings without physically simulating use.
- Ordering the microwave before obtaining its installation instructions.
Each mistake comes from reducing a three-dimensional installation to one or two headline dimensions.
Built-in appliances punish that shortcut.
What to Measure Before Visiting a Retailer or Installer
A homeowner does not need to become a cabinet engineer to arrive prepared.
A basic pre-purchase measurement session can produce most of the information needed for an informed discussion.
Bring:
- Three width measurements.
- Three height measurements.
- Usable depth.
- Cabinet or opening photographs.
- Receptacle position.
- Existing appliance model number.
- Existing trim-kit number, if relevant.
- Nearby wall and appliance clearances.
- Preferred installation height.
- Maximum available drawer or door operating space.
Then ask for the installation document for the exact proposed model.
This shifts the conversation away from whether a microwave is described as “24-inch” or “30-inch” and toward whether its actual installation requirements match the kitchen.
That is a far more useful question.
Final Considerations
Measuring for a built-in microwave or microwave drawer is not difficult because the arithmetic is complicated. It is difficult because several different dimensions are easily mistaken for one another.
Appliance width is not cutout width. Cabinet width is not opening width. Trim width is not cavity width. Cabinet depth is not necessarily usable depth. A microwave that physically enters an opening is not necessarily installed correctly.
The reliable process starts by identifying the exact installation type and obtaining the manufacturer’s instructions. The opening should then be measured at multiple points for width and height, while depth should account for receptacles, plugs and other obstructions.
For trim-kit installations, compatibility must be verified by model rather than assumed from visible dimensions. Manufacturers design those kits not only to finish the opening but also to secure the appliance and manage airflow.
Microwave drawers add movement and structural considerations. The cabinet must accommodate the appliance when closed and the drawer when extended. Support requirements and anti-tip provisions need to be incorporated into the cabinetry rather than discovered during installation.
The surrounding kitchen deserves equal scrutiny. Landing space affects how safely and comfortably hot cookware can be handled. Installation height affects visibility, lifting and bending. Adjacent doors, handles and traffic routes can turn a technically correct installation into an awkward one.
For replacement projects, the existing cabinet opening should be treated as the starting point. Record it carefully, photograph it and preserve the old model and trim information. A new microwave should be selected against those dimensions rather than chosen first and forced into the space later.
Above all, measure what actually exists.
Measure the opening at several points. Measure usable depth. Measure the receptacle. Measure moving clearance. Measure the nearby work surface. Then compare every figure with the installation drawing for the exact appliance and accessory combination.
That process lacks the excitement of comparing wattage, sensor modes or finishes, but it determines whether those features ever reach the kitchen without a cabinet saw becoming involved.
A disciplined microwave buying guide ultimately treats installation measurements as product specifications in their own right. The appliance and cabinet are two halves of one installation. When their dimensions agree on paper before the order is placed, the project has a far better chance of agreeing in wood, metal and wiring after delivery.