
The vent filter beneath an over-the-range microwave performs a job that is easy to ignore because much of what it captures is meant to disappear from view. Cooking sends airborne grease, moisture, particles and odors upward. The microwave’s ventilation system draws some of that air toward its filters, where grease can be intercepted before reaching internal components or ductwork.
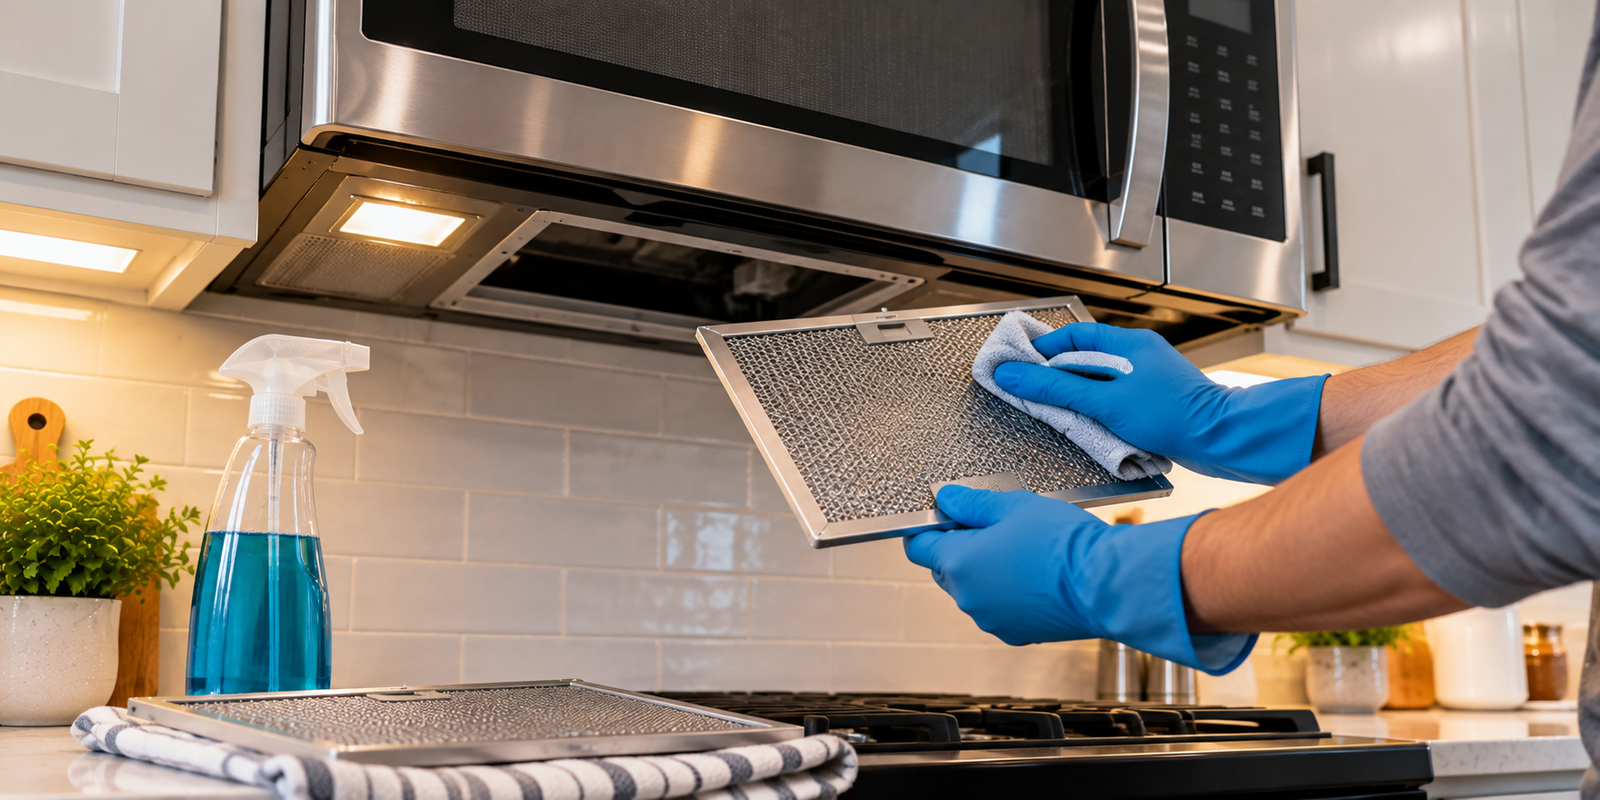
Eventually, the filter begins carrying a visible record of what has been cooked below it.
A neglected grease filter may darken, feel sticky and develop clogged mesh. A charcoal filter in a recirculating system can become saturated with cooking residue and odors. The two filters may appear to belong to the same maintenance problem, but they require fundamentally different treatment: grease filters are commonly washable and reusable, while charcoal filters generally are not.
That distinction should determine the entire maintenance routine.
Manufacturer guidance from Maytag recommends cleaning an over-the-range microwave’s grease filter monthly or when a filter-status indicator requests attention. The same guidance states that a charcoal filter cannot be cleaned and should generally be replaced about every six months, subject to the appliance’s instructions.
Cleaning a microwave vent filter, then, is less about aggressive scrubbing than identifying the filter correctly, removing it without damage, dissolving accumulated grease and reinstalling it only after it is clean and dry.
First, Understand What the Filter Is Doing
An over-the-range microwave combines two appliances in one housing. Above the stove sits a microwave oven; beneath it is a ventilation system intended to collect air rising from the cooking surface.
The filter sits between that contaminated air and part of the ventilation system.
Cooking itself can generate indoor particulate matter. The U.S. Environmental Protection Agency says cooking appliances and cooking activities can increase indoor particulate-matter levels, with the amount affected by the food, cooking method and cooking fat. The agency recommends using a range hood during cooking and, where possible, exhausting it outdoors.
That context explains why filter maintenance is more than cosmetic housekeeping.
Grease released during frying, sautéing and other high-temperature cooking can travel with rising air. The grease filter provides a physical surface on which some of those droplets and residues can collect.
As accumulation grows, the mesh becomes progressively less open.
The filter is therefore a maintenance component rather than a permanent, untouched part of the appliance.
Know Which Filter Is Which
Before removing anything, determine whether the microwave contains a grease filter, a charcoal filter or both.
Grease Filter
The grease filter is commonly located on the underside of the microwave, directly above the cooking surface. It usually resembles a thin metal frame filled with layers of aluminum or other metallic mesh.
Its job is primarily mechanical: intercept airborne grease and debris before those materials move farther into the ventilation path.
This type is generally reusable.
Whirlpool states that grease filters on its over-the-range microwaves should be cleaned monthly and recommends mild soap and water. It also notes that many can be cleaned in a dishwasher, although the owner’s manual should be checked first.
Charcoal Filter
A charcoal filter performs a different function.
It is associated with recirculating installations, where air is filtered and returned to the room rather than discharged through an exterior duct.
GE states that a charcoal filter must be used when an over-the-range microwave is not vented outdoors and emphasizes that replacement filters are model-specific.
Charcoal adsorbs odor-producing compounds onto its large internal surface area. Once the filter becomes loaded with contaminants, washing is not the remedy.
The charcoal filter is replaced.
That single distinction prevents one of the most common maintenance errors: putting a disposable charcoal filter into a sink full of detergent because it looks dirty.
Step 1: Find the Model Number and Check the Manual
Before removing the filter, identify the microwave model.
Filter placement varies. Some grease filters slide horizontally before dropping down. Others pivot from a slot or are retained by a screw. Charcoal filters may sit behind an upper grille, behind a small filter door or behind another filter assembly.
A microwave buying guide may discuss ventilation capacity, dimensions and installation type, but ongoing maintenance ultimately depends on model-specific construction.
The owner’s manual can answer several questions immediately:
- Where is the grease filter?
- Is it dishwasher-safe?
- How is it removed?
- Does the appliance use a charcoal filter?
- Where is the charcoal filter located?
- What replacement part number is required?
- Does the microwave have a filter-status indicator?
- How is that indicator reset after maintenance?
The manual should override generic cleaning instructions whenever the two differ.
Step 2: Disconnect Power and Let the Cooking Area Cool
Filter maintenance begins with the appliance off and the surrounding cooking area cool.
For models whose instructions call for electrical disconnection, unplug the microwave where the receptacle is accessible or disconnect power as directed by the manufacturer.
Whirlpool’s detailed cleaning procedure begins by instructing the user to make sure the microwave is turned off before removing the grease filter. Its model guidance on microwave filter maintenance also describes procedures for removing, cleaning and replacing filters.
The cooktop beneath the microwave should also be cool.
This is not merely procedural neatness. The person cleaning the filter will typically work directly over burners or heating elements while reaching toward the underside of the microwave.
Remove cookware from the stove before beginning. That creates a clearer working area and prevents a loosened filter from falling into a pot, pan or fragile object.
Step 3: Remove the Grease Filter Carefully
Inspect the underside of the microwave.
A typical grease filter is a shallow rectangular metal panel. Depending on the model, there may be one filter or multiple filters.
Many slide slightly toward one side before the opposite edge can be lowered. Maytag describes a common arrangement in which the filter is slid away from its tab area and then dropped out.
Do not force it.
Years of grease accumulation can make a filter feel stuck, but bending the frame to remove it can create a poor fit when it is reinstalled. If the filter does not move with modest pressure, consult the manual before applying greater force.
Some models secure the filter with a screw. Whirlpool documentation for certain over-the-range units, for example, instructs the user to loosen a grease-filter screw before sliding the filter from the bottom plate.
Once removed, hold the filter over a washable surface. A heavily neglected filter can release greasy droplets or debris.
Step 4: Inspect the Filter Before Cleaning
A quick inspection determines whether ordinary washing is likely to be enough.
Hold the filter under good lighting.
A serviceable but dirty grease filter may show:
- Brown or amber discoloration
- Sticky surfaces
- Grease embedded in the mesh
- Dust adhering to oily areas
- Reduced visibility through the mesh
- Uneven dark patches
Also inspect the frame.
If it is severely bent, broken, corroded or separating from the mesh, replacement may be more appropriate than cleaning. The objective is not merely to make the filter look better. It has to reinstall securely and maintain its intended shape in the airflow path.
A filter that has gone years without cleaning can require repeated washing.
The sensible response is patience rather than harsher chemistry.
Step 5: Prepare Hot, Soapy Water
For a washable metal grease filter, fill a sink or basin with hot water and dishwashing detergent.
Whirlpool’s cleaning procedure recommends soaking the filter in hot, soapy water. For an exceptionally dirty filter, its guidance says approximately ¼ cup of baking soda can be added, followed by a soak of at least 10 minutes or longer when necessary.
The detergent is doing much of the useful work.
Kitchen grease consists of fats and other cooking residues that adhere strongly to metal surfaces. Dishwashing detergents contain surfactants that help loosen and suspend greasy material in water.
Hot water can help soften the residue, although the temperature should remain safe for handling and compatible with the filter.
Submerge the grease filter fully where possible.
A filter that immediately turns the water cloudy or brown is revealing how much material was held inside its mesh rather than merely on its visible surface.
Step 6: Give the Detergent Time to Work
The instinct to begin scrubbing immediately is understandable but inefficient.
Let the filter soak first.
Ten minutes is a useful manufacturer-backed starting point in Whirlpool’s procedure for a heavily soiled filter, with longer soaking allowed where necessary.
During this period, detergent reaches into the layered mesh where a brush cannot easily penetrate.
If the water becomes heavily contaminated, drain it and prepare a fresh solution.
A filter neglected for a long period may need more than one soaking cycle. Replacing greasy water with fresh detergent solution can be more effective than continuing to work in water already loaded with oils.
The objective is to remove residue without distorting the filter.
Step 7: Brush Gently
After soaking, use a dish brush, old toothbrush or similar cleaning brush to work over the filter.
Brush in several directions so the bristles reach different surfaces of the mesh.
Whirlpool specifically advises gentle pressure and warns against bending the filter or its frame.
That warning matters.
Metal grease filters are often thin because air must pass through them readily. Their lightweight construction makes them easy to deform.
Aggressive scrubbing can turn a dirty but functional filter into a clean filter that no longer fits.
Concentrate on visibly clogged areas and along the perimeter, where grease can collect against the frame.
If substantial grease remains, another soak is preferable to increasingly forceful brushing.
Step 8: Rinse Thoroughly
Rinse the filter with clean water after washing.
The goal is to remove both loosened grease and detergent.
Run water through the mesh from different directions. Residue can remain between multiple mesh layers even after the exterior looks clean.
Continue until the runoff is clear and the filter no longer feels coated with detergent.
This stage provides a useful visual test. Hold the rinsed filter toward a light source. The mesh should appear substantially more open and consistent than before cleaning.
Perfect cosmetic restoration is not always realistic. Metal exposed repeatedly to cooking vapors can discolor permanently.
Cleanliness and airflow matter more than returning the filter to its original color.
Step 9: Decide Whether to Use a Dishwasher
Dishwasher cleaning is possible for many grease filters, but it should not be assumed.
Maytag states that most grease filters can be placed in a dishwasher for additional cleaning but directs owners to verify this in the owner’s manual. Whirlpool documentation for certain models explicitly permits cleaning the grease filter with a dishwasher.
That makes the manual the deciding authority.
Dishwasher detergent, water temperature and wash action can be more aggressive than hand washing. Aluminum filters can also change appearance after dishwasher exposure.
If the manual permits dishwasher cleaning, position the filter so water can circulate through it and so it cannot interfere with spray arms.
If the manual is unavailable or ambiguous, hand washing with mild dish detergent is the more controlled approach.
Step 10: Let the Filter Dry Completely
Do not reinstall a grease filter dripping with water.
Whirlpool instructs users to allow the filter to air-dry or dry it with a clean cloth or paper towel before replacement.
Air drying is simple: place the filter upright on a clean towel where air can reach both sides.
The layered mesh can retain water longer than its surface appearance suggests. Give it enough time to drain fully.
This pause is also an opportunity to clean the accessible underside of the microwave around the filter opening.
Use only cleaning methods approved for the appliance surface. Avoid flooding openings or allowing liquid to enter the ventilation system.
Step 11: Clean the Filter Housing Area
With the grease filter removed, inspect the surrounding metal and trim.
Grease frequently accumulates around the perimeter because not every airborne droplet reaches the filter mesh.
Wipe accessible surfaces with a soft cloth and a suitable mild cleaner according to the microwave’s care instructions.
Do not spray cleaning fluid directly into fan openings, electrical areas or the interior of the ventilation path.
This distinction is important: cleaning the removable filter is routine maintenance; dismantling the blower or washing internal electrical components is not.
If grease accumulation extends deep into inaccessible parts of the ventilation system, professional servicing or duct cleaning may be appropriate.
Step 12: Reinstall the Grease Filter Correctly
Once completely dry, reinstall the filter in the reverse sequence used for removal.
For the common tab-style arrangement described by Maytag, one end enters the opening opposite the tab area, the other end swings upward and the filter then slides toward the tab until secured.
Check the fit.
The filter should not hang loosely, bow downward or appear partially disengaged.
If the appliance uses screws, reinstall them as directed without overtightening and damaging the filter frame.
Do not intentionally operate the ventilation system without required filters installed. Manufacturer documentation for some over-the-range units specifically warns against operating the hood without its filters in place.
Step 13: Treat the Charcoal Filter Differently
If the microwave recirculates air into the kitchen, it may also contain a charcoal filter.
Do not wash it.
Whirlpool states that its microwave charcoal filters cannot be cleaned and recommends replacement every six months for the models covered by its guidance.
Replacement intervals can vary by manufacturer and model, so the owner’s manual remains the final reference.
Charcoal filters are often hidden behind the front ventilation grille rather than exposed beneath the microwave. Access can require removing screws or opening a dedicated filter door.
GE documents several arrangements, including charcoal filters behind an upper grille. Its replacement instructions for models with a grille above the door begin by disconnecting power, removing the appropriate grille screws, pulling away the grille and exchanging the old filter for the new one.
The replacement filter must match the model.
A charcoal panel that looks approximately the right size is not enough. GE explicitly describes these filters as model-specific.
How to Tell When a Charcoal Filter Is Spent
Calendar intervals are useful, but the filter can also provide physical clues.
GE identifies several indicators for charcoal-filter replacement: grease filling the filter, unexpected old cooking odors appearing when the ventilation system operates, and a filter surface becoming shiny rather than retaining its normally dull and porous appearance.
Those signs describe saturation rather than simple surface dirt.
Washing cannot restore the adsorption capacity of a disposable microwave charcoal filter designed for replacement.
For households that fry or sear frequently, the filter may accumulate contaminants faster than it would in a kitchen used mainly for boiling water and reheating food.
Maintenance schedules are therefore a baseline, not a reason to ignore visible deterioration.
Why Monthly Grease-Filter Cleaning Is a Useful Baseline
Both Maytag and Whirlpool recommend monthly grease-filter cleaning in their current product-help guidance.
That frequency may initially sound excessive because the underside of a microwave can appear relatively clean.
The mesh tells a different story.
Airborne grease can collect gradually. Waiting until the filter is visibly coated means the spaces within the mesh may already contain substantial residue.
A monthly schedule has another practical advantage: recently deposited grease is generally easier to remove than a thick layer repeatedly heated by cooking below.
The maintenance task becomes a short soak and rinse instead of a restoration project.
A recurring date is useful. The first weekend of each month, for example, can be treated as filter day. Appliances with a filter-status indicator provide another prompt, although the manual should explain what that indicator measures and how to reset it.
When a Clean Filter Does Not Fix Weak Ventilation
Cleaning the filter is not a universal cure for poor exhaust performance.
If airflow remains weak after filter maintenance, the problem can lie elsewhere.
Maytag’s troubleshooting guidance recommends testing filter performance and states that if removing the filter does not improve performance on an externally vented unit, the exterior damper, insect screen or vent system may need inspection or cleaning. It also advises against continuing to operate the microwave with required filters removed.
Possible causes of poor ventilation include:
- Obstructed exterior wall or roof cap
- Grease accumulation inside ductwork
- Restricted duct geometry
- Damper malfunction
- Blocked insect screen
- Incorrect vent configuration
- Blower problems
- Filters installed incorrectly
- A saturated charcoal filter in a recirculating installation
Cleaning one metal panel cannot compensate for a blocked exhaust path.
That diagnostic distinction can prevent repeated washing of an already clean filter while the actual restriction remains untouched.
Externally Vented and Recirculating Systems Are Not Equivalent
Filter maintenance also exposes a broader distinction between two ventilation strategies.
An externally vented over-the-range microwave sends captured air through ductwork to the outdoors. A recirculating unit filters the air and returns it to the room.
The EPA recommends outdoor venting where possible and says using a range hood during cooking can greatly reduce exposure to indoor particulate matter. It also recommends leaving the hood operating for 10 to 20 minutes after cooking and using rear burners when possible because they generally align better with hood capture.
A charcoal filter can reduce odors in recirculating air, but recirculation does not turn the system into an exterior exhaust.
That distinction belongs in any microwave buying guide because ventilation configuration affects both installation and long-term filter maintenance.
A ducted installation may rely primarily on washable grease filtration, while a recirculating configuration adds recurring charcoal-filter replacement.
Cleaning Habits That Cause More Harm Than Good
Several aggressive cleaning methods create unnecessary risk.
Boiling a filter is one. Unless the manufacturer specifically instructs it, extreme heat adds little that controlled soaking and detergent cannot accomplish with less risk of distortion.
Harsh chemical degreasers present another problem. A cleaner suitable for a commercial steel hood is not automatically suitable for a lightweight microwave filter, surrounding painted surfaces or aluminum mesh.
Forceful scraping can tear mesh.
Pressure washing is equally inappropriate for a small appliance component.
And charcoal filters should not be soaked, scrubbed, rinsed or placed in a dishwasher when the manufacturer identifies them as non-cleanable.
The objective is not maximum cleaning force. It is removal of grease while preserving the component’s geometry and material.
A Practical Maintenance Schedule
A simple schedule can keep the ventilation system from disappearing from household attention:
- After grease-heavy cooking: Inspect the underside for obvious splatter and wipe accessible exterior surfaces after they cool.
- Monthly: Remove and clean the washable grease filter, following the model’s manual.
- During monthly cleaning: Inspect the filter for bending, corrosion, torn mesh or poor fit.
- About every six months where specified: Replace the non-washable charcoal filter in a recirculating installation.
- When airflow weakens: Check filters, vent openings, exterior dampers and other accessible obstructions according to manufacturer instructions.
- When persistent old odors appear: Inspect the charcoal filter if the microwave recirculates air.
- When replacing a filter: Use the appliance model number to identify the correct part rather than buying solely by approximate dimensions.
The exact schedule should always yield to the owner’s manual.
Cooking habits also matter. A household that frequently pan-fries at high temperatures exposes its filter to a different load from one using the cooktop only occasionally.
When the Grease Filter Should Be Replaced
A washable filter is reusable, not indestructible.
Replacement becomes reasonable when the filter can no longer be restored to usable condition or has suffered physical damage.
Signs can include:
- Torn or separated mesh
- A badly bent frame
- Corrosion affecting the structure
- A filter that no longer stays in its mounting position
- Heavy contamination that remains after repeated appropriate cleaning
- Missing tabs or retaining features
Replacement should match the exact appliance model where specified.
A filter’s dimensions alone may not reveal differences in mounting tabs, frame thickness or retention design.
This is one area where improvisation offers little benefit. The filter is inexpensive relative to the appliance and sits directly in its intended airflow path.
Final Considerations
The vent filter under an over-the-range microwave is a small component exposed to an unusually demanding environment. Heat rises toward it. Moisture reaches it. Grease condenses on it. Dust adheres to that grease. The ventilation fan then attempts to pull air through the same mesh again and again.
Maintenance interrupts that accumulation.
For a washable grease filter, the routine is straightforward: shut down the appliance as directed, remove the filter carefully, inspect it, soak it in hot soapy water, brush gently, rinse thoroughly, dry completely and reinstall it securely. Current Maytag and Whirlpool guidance uses monthly cleaning as a baseline for the grease filters covered by their instructions.
A charcoal filter requires the opposite approach. It should not be treated as a dirty grease filter waiting for a stronger detergent. For models using replaceable charcoal filtration, manufacturer guidance identifies it as a non-cleanable component that must periodically be exchanged for the correct model-specific replacement.
The distinction is simple but consequential: metal grease filtration is maintained primarily through cleaning; disposable charcoal filtration is maintained through replacement.
Neither process compensates for blocked ductwork, a malfunctioning damper or a ventilation system configured incorrectly. If airflow remains poor after proper filter maintenance, the investigation should move downstream rather than subjecting an already clean filter to another round of scrubbing.
Regular maintenance has an advantage beyond cleaner metal. It turns the filter into an observable part of the kitchen rather than an invisible component remembered only after airflow deteriorates. A monthly inspection takes minutes when grease is fresh. Neglect converts the same task into layers of sticky residue embedded deep in fine mesh.
The humble filter therefore offers a useful lesson in appliance care: the easiest maintenance is usually the maintenance performed before performance noticeably declines.