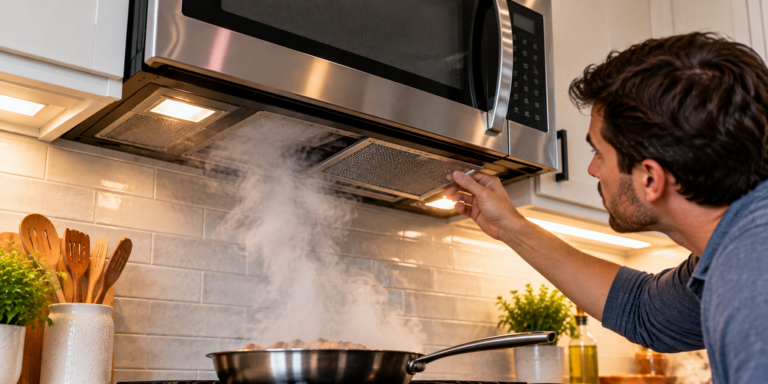
Microwave cleaning looks simple until appliance design enters the equation. A countertop microwave can usually be approached from several sides and unplugged without much effort. A built-in microwave may sit tightly inside cabinetry. An over-the-range model doubles as part of a ventilation system. A microwave drawer introduces horizontal tracks, sealing surfaces and a cavity that opens upward rather than outward.
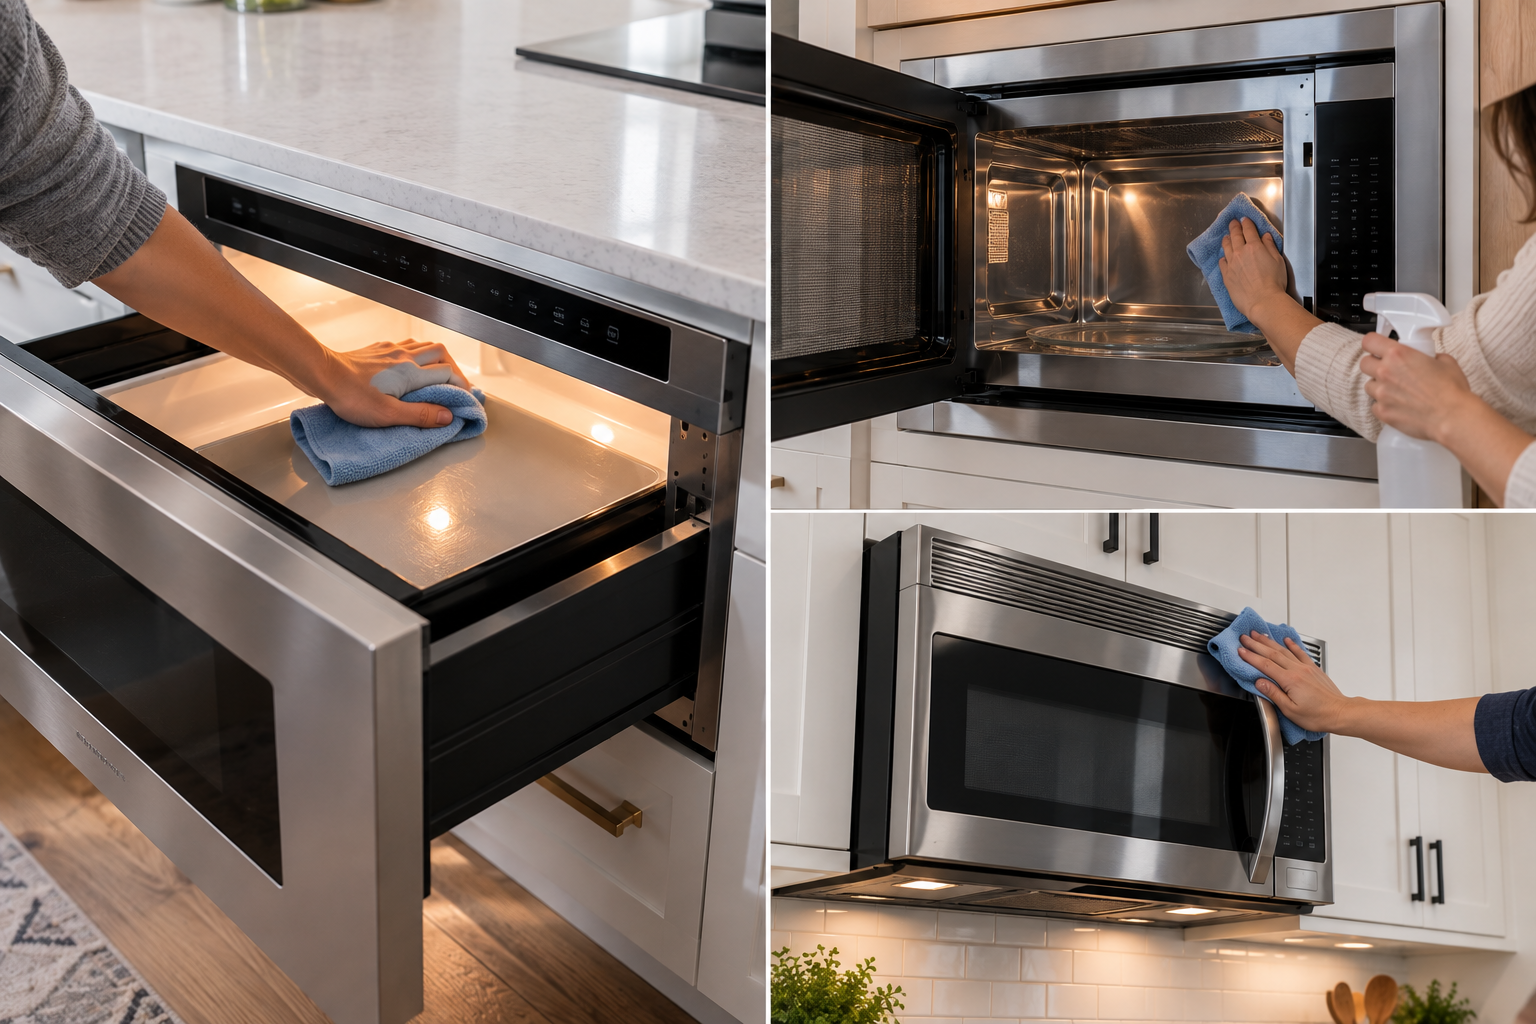
Those differences change how cleaning should be handled.
The basic principle remains surprisingly restrained. According to the U.S. Food and Drug Administration’s microwave-oven guidance, owners should “Regularly clean the oven cavity, the outer edge of the cavity, and the door with water and a mild detergent.” The FDA adds that a special microwave cleaner is unnecessary and advises against scouring pads, steel wool and other abrasives.
That is a useful starting point because aggressive cleaning is often counterproductive. A microwave is not a barbecue grate. Its cavity, door, seals, control surfaces and—in some models—waveguide cover are components that should be cleaned without scraping, flooding or saturating them with powerful chemicals.
The correct method is therefore less about attacking grime and more about controlling moisture, softening residue and understanding which parts of the appliance require separate treatment.
Start by Identifying the Microwave Type
Before reaching for a sponge, identify what is actually being cleaned.
A microwave drawer slides horizontally from cabinetry, with food lowered into the cavity from above. Because its opening mechanism differs from a hinged-door microwave, crumbs can migrate into drawer guides and moving areas.
A built-in microwave is installed within cabinetry or a wall enclosure, often surrounded by trim. Cleaning the cooking cavity is broadly similar to cleaning other microwave interiors, but vents, trim and electrical access vary by model.
An over-the-range microwave, usually abbreviated OTR, combines microwave cooking with a hood or ventilation function above a cooktop. That creates an additional cleaning job: grease filtration.
The model number and owner’s manual deserve attention before filters, covers, trim pieces or other removable components are taken apart. Even appliances that look nearly identical can use different filter arrangements or access methods.
A good microwave buying guide should consider cleaning access before purchase for the same reason. Maintenance is part of ownership. A polished control panel matters less over several years than accessible filters, replaceable parts and surfaces that can be cleaned without dismantling half the kitchen.
What Is Needed Before Cleaning
Most routine microwave cleaning requires remarkably little equipment.
A practical kit includes:
- Soft microfiber cloths
- A nonabrasive sponge
- Mild dish detergent
- Warm water
- A microwave-safe bowl or container when steam softening is appropriate
- A soft brush for removable grease filters when permitted by the manufacturer
- Dry towels for removable components
Avoid automatically reaching for steel wool, abrasive powders, rough scouring pads or oven cleaner. The FDA specifically advises against abrasive materials for routine cavity and door cleaning.
Microwave-drawer instructions can be even more explicit. In an official Sharp Microwave Drawer operation manual, the manufacturer directs owners cleaning sealing surfaces to use “only mild, nonabrasive soaps or detergents applied with a sponge or soft cloth.”
The restraint is intentional. Cleaning should remove food without creating a second problem in the form of scratched surfaces, damaged seals or liquid entering areas never intended to be wet.
Step 1: Shut Down the Appliance
The first step is simple: stop cooking and allow hot surfaces or accessories to cool.
Where the manufacturer’s cleaning procedure calls for electrical disconnection, unplug the appliance or disconnect power using the specified method. Built-in and over-the-range models are not always easily unplugged, so the owner’s manual should govern procedures involving filter compartments, grilles, lamps or disassembly.
GE, for example, instructs users to disconnect power at the main fuse or circuit breaker, or unplug the microwave, before certain over-the-range charcoal-filter replacement procedures.
Routine wiping of an accessible cavity is different from opening ventilation compartments. The deeper the maintenance task goes into the appliance, the more closely model-specific instructions should be followed.
Remove loose cookware, racks and removable trays when the manual permits. This exposes the surfaces where grease and food debris accumulate.
Step 2: Remove Loose Crumbs Before Adding Moisture
Water should not be the first response to every mess.
Dry crumbs, seeds and other loose debris are easier to remove before they become wet. Wipe them out with a dry or slightly damp soft cloth. This is particularly useful around corners, beneath a turntable and inside a microwave drawer.
Drawer models deserve special attention because crumbs can migrate toward the guides.
Sharp’s cleaning guidance for microwave drawers specifically instructs users to remove food crumbs from the drawer guides and wipe those guides with a soft, dry cloth so the drawer continues opening and closing easily.
That detail illustrates why microwave type matters. On a conventional built-in unit, crumbs are mostly a cavity-cleaning problem. On a drawer, they can also become a mechanical nuisance.
Do not force food debris farther into openings while cleaning. A soft cloth and patient removal are preferable to aggressive scraping.
Step 3: Soften Dried Food Rather Than Scraping It
Dried sauce can turn a five-second splatter into a stubborn patch after repeated heating cycles. Mechanical force is rarely the smartest response.
For models whose manuals permit it, steam generated from heating water in a microwave-safe container can soften adhered food. After the heating cycle, the moisture can make residue easier to wipe away.
There is a safety boundary here. Water should not be heated excessively.
The FDA warns that liquids heated beyond their conventional boiling temperature can become superheated and may erupt violently when disturbed or when ingredients are added. Its guidance says not to heat water or liquids longer than recommended by the microwave manufacturer’s instructions.
That makes extreme “boil it until everything steams loose” cleaning tricks a poor strategy. The objective is controlled softening, not producing the maximum possible amount of steam.
Once residue has softened, wipe it with a damp nonabrasive cloth or sponge. Repeat the softening process if necessary rather than escalating immediately to scraping.
Step 4: Clean the Interior With Mild Detergent
For ordinary cavity cleaning, mild detergent and water remain the safest general baseline.
Wring the cloth or sponge out before use. The surface should be cleaned with moisture, not flooded. Pay attention to the cavity walls, floor, ceiling and corners where splatter collects.
Repeated passes are often more effective than excessive detergent. A first pass removes loose residue. A second addresses remaining grease. A final damp-cloth wipe removes soap.
Sharp’s microwave-drawer guidance states that heavier soil can be treated with mild soap and then wiped clean with a soft damp cloth. It also warns against chemical oven cleaners in the drawer interior.
This distinction matters for combination kitchens. A microwave installed near a conventional oven is still a microwave. A cleaner intended for baked-on residue in a conventional oven should not automatically migrate into the microwave cavity.
Step 5: Treat the Waveguide Cover Gently
Some microwaves have a visible waveguide cover inside the cavity. Depending on design, it can resemble a small rectangular panel and may be made from mica or another microwave-transparent material.
It should not be treated as an inconvenient piece of packaging.
Sharp describes the waveguide cover in its drawer documentation as requiring “special care” and directs users to carefully wipe food splatters from it with a soft, damp cloth.
Do not pry at the cover merely because food has landed on it. Do not attack it with an abrasive pad. If it appears burned, damaged or loose, consult the manufacturer’s instructions or service guidance rather than improvising a repair.
This is one of the areas where gentle routine cleaning pays dividends. Fresh splatter is easier to remove than residue that has repeatedly been heated.
Step 6: Clean the Door and Sealing Surfaces
The door is not merely a window with a handle attached. Its closing surfaces form part of the microwave’s physical safety system.
The FDA advises regularly cleaning the outer edge of the cavity and the door using water and mild detergent. It also advises owners not to operate a microwave if its door does not close firmly or if it is bent, warped or otherwise damaged.
Wipe the door edges, mating surfaces and surrounding frame with a soft damp cloth. Food buildup should be removed without gouging, bending or scratching these areas.
Avoid spraying cleaner directly into seams, vents or openings. Applying cleaning solution to the cloth offers far greater control.
After cleaning, inspect the door as part of the process. It should close normally and without obstruction. A damaged door or compromised closing mechanism is not a housekeeping issue to solve with more scrubbing.
Step 7: Wash the Turntable and Removable Parts Separately
Conventional built-in and over-the-range microwaves often use a removable glass turntable with a roller ring or support underneath.
Once cool, removable pieces can be cleaned according to the owner’s manual. Warm water and mild detergent are generally preferable to abrasive treatment.
Clean beneath the turntable before reinstalling it. Food fragments caught around the support or rollers can produce noise and interfere with smooth rotation.
Dry components before returning them to the appliance, and make sure the turntable is correctly seated. A tray resting incorrectly on its drive mechanism can wobble even though nothing is mechanically wrong with the microwave.
Racks require separate attention. Metal racks supplied with some combination or convection microwaves are engineered for specific operating modes and positions. Their presence does not mean arbitrary metal accessories are microwave-safe. Follow the appliance instructions for removal, cleaning and reinsertion.
Step 8: Clean a Microwave Drawer Differently
A microwave drawer presents several distinctive cleaning surfaces: the cavity, upper interior, sealing areas, drawer front and guides.
Start with loose crumbs, particularly around the guides. Then wipe the interior using a soft damp cloth and mild soap when heavier soil requires it.
Do not pour water into the drawer.
The drawer front and control area should be approached with similarly controlled moisture. Apply cleaner to a cloth rather than spraying heavily across controls or gaps.
The horizontal design can make the upper interior less visible than the back wall of a conventional microwave. Inspect it deliberately rather than assuming the surfaces that cannot be seen from standing height are clean.
The guides also deserve periodic attention. Their job is mechanical, so leaving them free of food debris is more useful than coating them with an improvised cleaner or lubricant that the manufacturer has not specified.
Step 9: Give Built-In Microwaves Special Attention Around Trim and Vents
Built-in microwaves create a different maintenance temptation: cleaning only what is visible through the open door.
Exterior trim can collect dust and cooking residue, while ventilation openings can accumulate debris. These areas should be wiped carefully without forcing water into them.
Do not remove decorative trim or pull a built-in appliance from cabinetry merely for routine cleaning unless its manual specifically directs such action. Built-in installations can involve mounting hardware, ventilation clearances and electrical connections that are not apparent from the front.
Clean accessible trim with an appropriate soft cloth. Stainless-steel finishes should be treated according to the manufacturer’s finish-specific instructions because coatings and surface treatments vary.
Vent openings should remain unobstructed. A cloth can remove accessible surface dust, but pushing tools deep into an opening creates more risk than benefit.
Step 10: Treat an Over-the-Range Microwave as a Ventilation Appliance Too
An OTR microwave has one maintenance burden that drawer and many built-in models do not: grease generated by the cooktop below.
That grease is captured by filters.
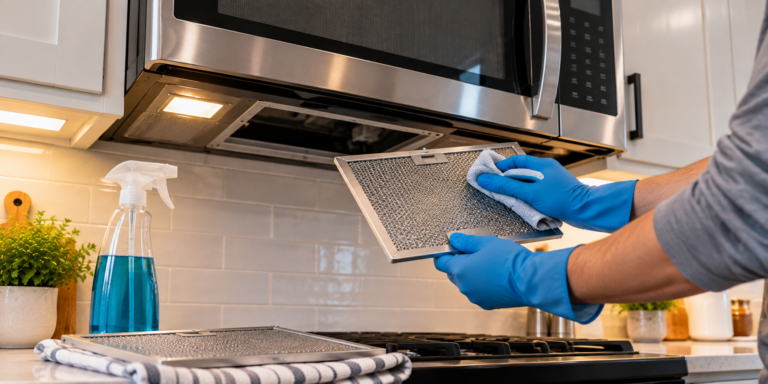
GE documentation explains that reusable metal grease filters trap grease released by foods on the cooktop and states that the filters should be cleaned once a month or as needed. Its instructions call for soaking and moving the filter around in hot water and detergent, with light brushing permitted for embedded dirt. The manufacturer warns against ammonia or ammonia products because they can darken the metal.
After washing, rinse the filter and allow it to dry before reinstalling it according to the model instructions.
A clogged grease filter is not merely unattractive. It is part of the hood’s airflow path. Regular cleaning is therefore maintenance of the ventilation function, not just cosmetic housekeeping.
Step 11: Do Not Confuse Grease Filters With Charcoal Filters
This distinction causes unnecessary maintenance mistakes.
Metal grease filters are commonly washable. Charcoal filters generally are not.
An over-the-range microwave configured to recirculate air into the kitchen rather than exhaust it outdoors may use a charcoal filter. GE states that a charcoal filter should be used when an OTR microwave is not vented outside and that charcoal filters are model-specific. The company advises replacement when the filter becomes filled with grease, develops heavy odor buildup or has a shiny surface indicating substantial grease accumulation. Its charcoal-filter guidance also stresses selecting the correct filter for the specific microwave model.
In practical terms:
- Wash a reusable metal grease filter according to its manual.
- Replace a disposable charcoal filter when its condition or manufacturer schedule calls for replacement.
- Do not assume two visually similar filters receive the same treatment.
- Verify the part number before ordering a replacement charcoal filter.
Trying to wash a filter designed for replacement can compromise its intended function.
Step 12: Clean the Exterior Without Flooding the Controls
Exterior grease often concentrates around handles and touch controls because those surfaces are repeatedly contacted during cooking.
Use a soft cloth lightly dampened with a suitable cleaning solution. Avoid directing sprays into the control panel, display edges, ventilation openings or seams.
For stainless steel, follow the appliance manufacturer’s surface-care instructions. Stainless-looking finishes are not necessarily identical; some appliances use coatings intended to resist fingerprints, and an abrasive or incompatible chemical can alter the finish.
Handles deserve particular attention because residue can accumulate on their underside where it is less visible.
Finish with a clean cloth so detergent residue does not become a new film that attracts fingerprints.
A Practical Cleaning Schedule
There is no universal calendar that fits every household. A microwave used to warm a beverage twice a week accumulates residue differently from an over-the-range unit sitting above daily frying and sautéing.
A workable maintenance rhythm is:
- After a spill: Wipe it once the appliance is safe to clean rather than allowing repeated cooking cycles to harden it.
- Weekly or as needed: Remove crumbs, inspect the cavity and wipe obvious splatter.
- Periodically: Clean the door edges, sealing surfaces, turntable support, exterior controls and accessible vents.
- For OTR models: Inspect grease filters frequently and follow the manufacturer’s cleaning interval; some GE documentation specifies monthly cleaning or cleaning as needed.
- For recirculating OTR models: Inspect the charcoal filter and replace it according to the appliance instructions and its physical condition.
- For microwave drawers: Keep the guides free of food crumbs and debris.
Cleaning frequency should follow actual cooking behavior. Heavy grease production, frequent uncovered reheating and repeated spills justify more frequent maintenance.
Cleaning Mistakes That Create More Work
Several habits make microwave maintenance harder rather than easier.
The first is postponing spills. Fresh food residue generally requires less effort than material that has gone through repeated heating cycles.
The second is using abrasives because they feel more effective. Scratching a surface to remove a stain trades temporary cleanliness for permanent damage.
The third is excessive liquid. Microwave cleaning is largely a wiping process. Controls, vents, seams and mechanical guides are poor destinations for runoff.
The fourth is assuming every removable-looking panel should be removed. Waveguide covers, ventilation grilles and built-in trim can have specific functions and attachment methods.
The fifth is treating every filter as washable. OTR grease filters and charcoal filters perform different jobs and can require different maintenance.
The sixth is ignoring door condition. Cleaning offers a natural opportunity to inspect the door, latch and surrounding surfaces. The FDA advises against operating an oven whose door does not close firmly or is damaged.
When Cleaning Stops Being the Answer
Some problems should not be scrubbed away.
A damaged door, broken latch, deteriorated sealing area, badly damaged waveguide cover, electrical fault or appliance that continues operating with its door open requires a different response.
The FDA specifically advises users to stop operating a microwave if it continues running with the door open.
Likewise, persistent burning smells after visible residue has been removed deserve investigation rather than repeated applications of cleaner. An unusual electrical smell is not equivalent to yesterday’s tomato sauce.
Owners should consult the model’s manual and qualified service support when symptoms suggest a mechanical or electrical problem.
Cleaning is preventive maintenance. It is not repair.
Final Considerations
Cleaning a microwave properly is less dramatic than many household hacks suggest. Mild detergent, controlled moisture, soft materials and regular attention handle much of the work.
The appliance design determines the additional tasks.
A microwave drawer needs clean guides and careful treatment of its sealing surfaces. A built-in microwave requires attention to accessible trim and ventilation without unnecessary disassembly. An over-the-range microwave adds an entire layer of maintenance through reusable grease filters and, on recirculating configurations, replaceable charcoal filtration.
Across all three designs, the same logic holds: remove crumbs before wet cleaning, soften stubborn residue instead of scraping it, keep abrasives away from the cavity and door, control moisture around electrical components, and follow model-specific instructions whenever parts must be removed.
The FDA’s guidance is refreshingly uncomplicated: water, mild detergent and regular cleaning are generally enough for the cavity, cavity edge and door, while abrasives should stay out of the process.
That modest prescription also says something useful about appliance ownership. A microwave does not need to look neglected before maintenance is justified. Cleaning is easier when residue is still minor, filters are merely dirty rather than saturated, and crumbs have not accumulated around moving components.
For anyone using a microwave buying guide to choose among drawer, built-in and over-the-range designs, maintenance access belongs beside capacity, wattage and cooking features on the evaluation list. Drawer guides need attention. Built-in placement affects access. OTR ventilation introduces filters that other designs may not have.
The cleanest microwave, ultimately, is rarely the one subjected to the strongest cleaner. It is the one whose spills are removed early, filters are maintained according to their design, door and sealing surfaces remain unobstructed, and specialized components are treated with enough restraint to keep cleaning from becoming damage.