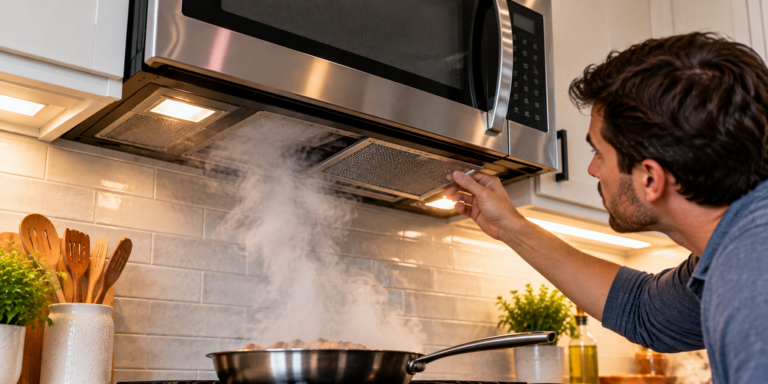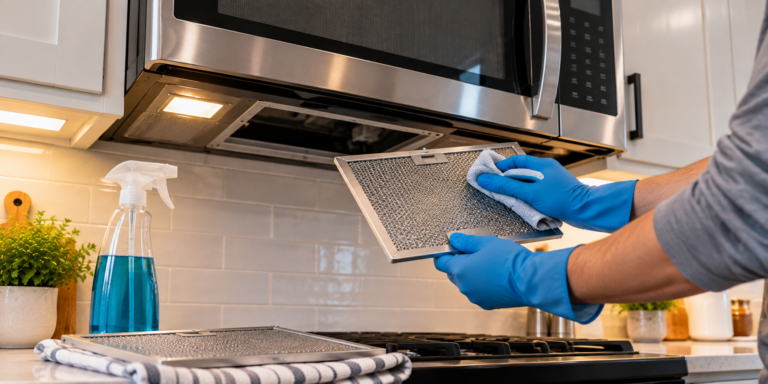
Air fryers have a talent for making grease look as though it has disappeared. A conventional fryer leaves an unmistakable quantity of oil behind. An air fryer can produce crisp chicken with no comparable reservoir, encouraging the impression that cleanup should amount to little more than shaking crumbs from a basket.
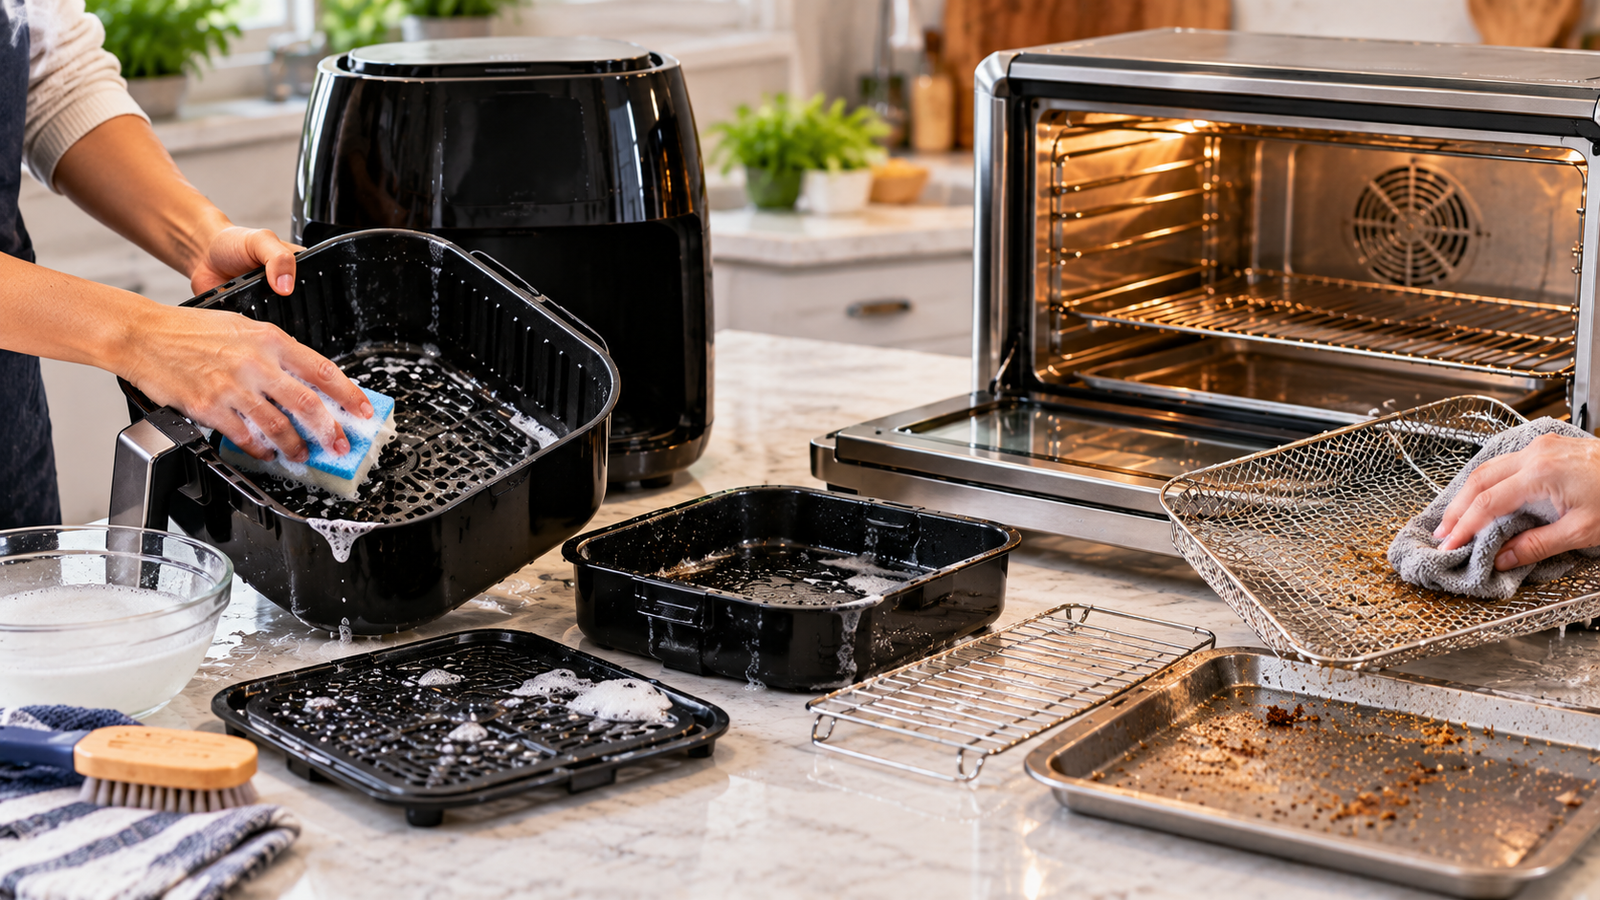
The appliance tells a different story after enough meals.
Rendered fat settles beneath crisper plates. Aerosolized grease reaches chamber walls and heating areas. Bread crumbs accumulate in toaster-oven trays. Marinades carbonize against baskets. Cheese finds openings that seemed geometrically impossible while the appliance was cold.
Cleaning is therefore not cosmetic housekeeping. It affects odor, smoke, food contact surfaces and, in extreme cases, fire risk.
The U.S. Fire Administration advises cleaning cooking equipment after each use, noting that accumulated crumbs or grease can catch fire. That principle applies particularly well to air fryer toaster ovens, where crumbs and rendered fat can collect beneath exposed racks and baskets.
The good news is that routine cleaning is much easier than rescuing an appliance after months of baked-on grease.
The method depends on the architecture. Basket air fryers generally separate into a powered main unit, removable basket and crisper plate. Air fryer toaster ovens add racks, mesh baskets, baking pans, glass doors, interior walls and crumb trays. The best air fryers are not necessarily the easiest to clean; removable components, surface materials and access can matter as much as cooking capacity.
The safest approach begins with the manufacturer’s manual, then applies a disciplined sequence: unplug, cool, disassemble, remove loose debris, wash removable parts, wipe the fixed housing, clean accessible cooking surfaces, dry everything and reassemble only when moisture is gone.
Step 1: Turn the Appliance Off, Unplug It and Let It Cool
Cleaning starts before water or detergent appears.
The appliance should be switched off, disconnected from the outlet and allowed to cool until its removable and fixed surfaces can be handled safely.
This is not an administrative detail.
An air fryer contains electrical components, heating elements and a high-speed fan. Water belongs on approved washable parts, not inside energized electrical assemblies.
Ninja’s owner guidance for its AF100-series basket air fryer instructs users to unplug the unit before cleaning and specifically states that the main unit should never be immersed in water or placed in a dishwasher.
Breville gives comparable preparation instructions for its Smart Oven platform: disconnect the plug and allow the oven and accessories to cool completely before disassembly and cleaning.
Cooling also changes how safely grease can be handled. Freshly rendered fat can remain hot long after food leaves the basket.
The appliance should be cool enough to touch, but cleaning should not be postponed for days. Fresh residue is generally easier to remove than grease that has been reheated repeatedly.
Step 2: Identify Which Parts Are Actually Washable
The fastest route to damaging an air fryer is assuming every removable-looking component can be washed in the same way.
Basket machines commonly contain:
- A removable outer basket or drawer
- A crisper plate, grate or rack
- Silicone bumpers or feet
- A powered main housing
- A heating element and fan area
Air fryer toaster ovens can add:
- Wire oven racks
- Mesh air-fry baskets
- Baking pans
- Broiling racks
- Rotisserie accessories
- Removable crumb trays
- Glass doors
- Fixed interior walls
- Heating elements
Dishwasher compatibility varies.
Ninja states in the AF100-series manual that its basket, crisper plate and accessories can be washed in a dishwasher. That instruction belongs to that product family; it should not be converted into a universal rule for every air fryer.
A manufacturer’s manual should settle four questions before deep cleaning begins:
- Which components are dishwasher safe?
- Which parts require hand washing?
- Which surfaces use nonstick coatings?
- How does the manufacturer instruct the user to clean the heating area?
When the manual says hand wash, the dishwasher is not an efficiency hack.
Step 3: Remove Crumbs and Loose Food Before Adding Water
Dry debris should come out first.
After the appliance cools, remove the basket, rack, crisper plate or crumb tray. Discard crumbs and loose food into the trash.
This simple order matters because adding water immediately turns dry crumbs into paste.
In a basket air fryer, food fragments often hide beneath the crisper plate. The plate should be lifted carefully so debris can be removed from the bottom of the basket.
In an air fryer toaster oven, the crumb tray deserves particular attention.
Breville’s cleaning guidance recommends emptying its Smart Oven Air Fryer crumb tray after every use. Its broader Smart Oven instructions call for wiping the tray with a soft damp sponge and soaking baked-on grease in warm soapy water before cleaning it with a soft sponge or soft plastic scouring pad.
The crumb tray is easy to ignore because it sits below the food.
That is precisely why it accumulates evidence.
Toast crumbs, pastry flakes, cheese, rendered fat and fragments from breaded foods can land there cycle after cycle. Repeated heating converts innocent crumbs into charred debris.
Step 4: Wash the Basket and Crisper Plate
For a conventional basket air fryer, these are the principal food-contact components and usually require the most frequent cleaning.
Warm water, dishwashing liquid and a soft sponge are the sensible starting tools unless the manufacturer specifies otherwise.
If grease is fresh, detergent and gentle mechanical action are usually more effective than aggressive scrubbing.
The sequence is straightforward:
- Remove loose food.
- Add warm water and dish detergent.
- Wash the basket’s bottom, sides and corners.
- Clean both sides of the crisper plate.
- Pay attention to perforations where grease and crumbs collect.
- Rinse thoroughly.
- Dry according to the manufacturer’s instructions.
Stuck residue deserves patience before force.
Ninja specifically recommends placing a basket or crisper plate with stuck-on residue in warm, soapy water and allowing it to soak.
That approach protects surfaces better than attacking carbonized food with an abrasive pad.
Step 5: Treat Nonstick Coatings as Finishes, Not Armor
Many basket air fryers use coated cooking surfaces.
A nonstick finish can make cleanup easier, but it also changes what should be used to clean the appliance.
Metal scouring pads, steel wool, knives and other hard tools can scratch coated surfaces. Even when a scratch does not immediately expose bare metal, repeated abrasive cleaning can shorten the useful life of the finish.
The cleaning strategy should escalate gradually:
- Warm soapy water first
- Soaking for stubborn residue
- Soft sponge or manufacturer-approved brush
- Non-abrasive cleaner only when explicitly permitted
The temptation to scrape is strongest when sugar, cheese or marinade has carbonized onto the basket.
Soaking is slower and usually less destructive.
Silicone bumpers fitted to some crisper plates also deserve gentle treatment. Their placement can be deliberate, protecting the basket coating or stabilizing the plate. They should not be removed merely because they look detachable unless the manual instructs the user to do so.
Step 6: Wipe the Main Basket-Air-Fryer Housing
The powered housing requires a different method from the removable basket.
It should not be submerged.
Ninja’s AF100 instructions call for cleaning the main unit and control panel with a damp cloth.
That distinction is fundamental.
A damp cloth means controlled moisture. It does not mean spraying cleaning solution directly into vents, around buttons or toward electrical openings.
Greasy fingerprints and cooking residue on the exterior can usually be removed with a soft cloth. If a cleaning product is needed, manufacturer instructions should determine what is compatible with the exterior finish.
Air intakes and exhaust vents should also remain unobstructed.
They are not storage ledges for grease-soaked cloths, paper towels or decorative covers while the appliance is operating.
Step 7: Inspect the Heating Area
The basket may look spotless while the upper cooking chamber tells another story.
Grease and food particles can reach the heating element area through circulating air and splatter. Over time, residue near the heater can contribute to smoke and unpleasant odors.
Access varies enormously by model.
Some basket air fryers expose the heating element when the basket is removed and the appliance is carefully positioned according to manufacturer guidance. Others make access more restricted.
Ninja’s AF100-series guidance instructs users to clean food residue from the heating element with a cleaning brush.
That does not authorize flooding the heater with detergent or water.
The appliance must be unplugged and cool. Loose debris should be removed gently. If the manufacturer supplies a specific method, that method should take priority over generic internet techniques.
Heating elements can be delicate, and nearby fan assemblies introduce electrical and mechanical components that should not be soaked.
Step 8: Clean an Air Fryer Toaster Oven From the Bottom Up
An air fryer toaster oven needs a different workflow because it behaves physically like an oven.
Once unplugged and completely cool, remove the accessories and begin with loose debris.
The crumb tray comes first.
Then remove racks, mesh baskets, baking pans and any other approved detachable components.
Cleaning from the lower surfaces upward prevents crumbs from being repeatedly redistributed through the cavity.
A practical sequence is:
- Remove and empty the crumb tray.
- Remove racks and cooking accessories.
- Brush or wipe loose crumbs from accessible interior surfaces.
- Wash the removable accessories according to their instructions.
- Clean the interior walls.
- Clean the glass.
- Wipe the exterior.
- Dry every component before reassembly.
The air fryer toaster oven generally has more surface area than a basket model, but much of that surface can be maintained through frequent light cleaning rather than occasional aggressive scrubbing.
Step 9: Give the Crumb Tray Its Own Routine
The crumb tray is one of the highest-return cleaning jobs on a toaster-oven-style appliance.
It takes only a short time to empty when residue is loose.
Neglect turns the same job into a baked-grease project.
Breville advises users to empty and clean the crumb tray after use on its Smart Oven Air Fryer Pro and related models.
The reason extends beyond appearance.
The U.S. Fire Administration’s cooking-safety guidance explicitly warns that crumbs in a toaster and grease on cooking equipment can catch fire.
A crumb tray should therefore be treated more like a routine waste collector than a hidden appliance component.
When greasy, it can be soaked if the manufacturer permits. When merely crumb-covered, emptying and wiping may be enough.
Dry it thoroughly before reinstalling it.
Step 10: Clean the Oven Interior Gently
The interior walls of an air fryer toaster oven accumulate a mixture of grease aerosol, smoke residue and splatter.
Aggressive oven-cleaning habits from a full-size range should not automatically be transferred to a countertop appliance.
Interior finishes differ.
Breville’s Smart Oven Air Fryer cleaning guidance recommends a soft microfiber cloth or sponge with mild detergent for the oven interior. Its manual also directs users toward non-abrasive cleaning methods for relevant surfaces.
A controlled method works well:
- Apply approved cleaner to the cloth or sponge rather than indiscriminately spraying the cavity.
- Wipe greasy surfaces.
- Avoid saturating vents, electrical openings and heating assemblies.
- Use a damp clean cloth to remove detergent residue where appropriate.
- Dry the interior before operation.
A countertop oven is not a sink.
Water should remain under control throughout the process.
Step 11: Clean the Glass Door Without Forgetting the Edges
Glass doors reveal grease with unusual honesty.
A transparent door can look dirty long before the rest of the appliance does because every fingerprint, streak and aerosolized-fat deposit catches the light.
Breville’s Smart Oven manual allows glass cleaner or mild detergent with a soft damp sponge or soft plastic scouring pad for its glass door. Other manufacturers may specify different methods.
The glass itself is only part of the job.
Grease can collect along door edges, around handles and near hinges. These areas should be wiped without flooding mechanical joints or electrical components.
French door air fryer ovens double the number of door edges and hinge areas.
Cleaning both doors regularly prevents the familiar transformation from transparent glass to amber-tinted mystery window.
Step 12: Wash Racks and Mesh Baskets Before Grease Hardens
Mesh air-fry baskets are effective at exposing food to circulating air.
They are equally effective at collecting tiny deposits in many tiny openings.
Waiting several cooking cycles allows grease to polymerize and food residue to harden around the mesh.
Cleaning soon after cooling is easier.
Warm soapy water and soaking can loosen residue before brushing. The manufacturer’s guidance should determine whether the basket can enter a dishwasher and what brushes or pads are acceptable.
Wire racks present a similar problem at welded joints and corners.
A soft brush can reach spaces a sponge cannot.
The objective is removal, not abrasion.
Step 13: Distinguish Cleaning From Sanitizing
Ordinary grease removal and food-safety sanitation are related but different jobs.
FoodSafety.gov recommends washing dishes, utensils, cutting boards and countertops with hot, soapy water after use, particularly after contact with raw meat, poultry, seafood or eggs.
An air-fryer basket that held raw chicken before cooking requires proper cleaning afterward, but the electrical appliance itself should not be casually treated with countertop disinfectants.
Food-contact accessories should be cleaned according to manufacturer directions. If a sanitizing step is required because of contamination, the material and appliance instructions must support the chosen sanitizer.
Bleach solutions that may be suitable for some kitchen surfaces are not automatically appropriate for nonstick baskets, heating chambers or electrical appliances.
Food safety does not justify damaging the equipment.
Step 14: Handle Raw-Meat Residue With Extra Care
Raw poultry juices deserve more attention than toast crumbs.
FoodSafety.gov’s core kitchen guidance emphasizes separation and washing surfaces and utensils that contact raw meat, poultry, seafood and eggs with hot, soapy water.
The cleaning sequence should prevent cross-contamination.
A basket that held raw chicken should not be placed on a clean countertop and then forgotten while cooked food is prepared nearby. Tongs used for raw meat should not return to cooked food without appropriate washing.
Hands matter too.
FoodSafety.gov recommends washing hands with soap and water for at least 20 seconds during food preparation, including after handling raw meat and poultry.
The air fryer may reach high cooking temperatures. That does not sanitize the kitchen surfaces touched during loading.
Step 15: Deal With Baked-On Grease Through Time, Not Violence
The worst air-fryer cleaning problems usually result from repeated heating.
A thin grease film that would have wiped away after dinner can become a hard brown layer after ten more cooking cycles.
Mechanical force is tempting.
It can also damage coatings, scratch stainless surfaces and deform mesh.
The safer sequence is generally:
- Remove the part if the manufacturer permits.
- Soak it in warm soapy water.
- Allow time for residue to soften.
- Wipe or brush with a non-abrasive tool.
- Repeat rather than escalating immediately to harsh chemistry.
Breville’s manual specifically recommends soaking its crumb tray in warm soapy water to remove baked-on grease before washing with a soft sponge or soft plastic scouring pad.
The principle transfers well to manufacturer-approved washable components.
Soaking lets chemistry do part of the work that would otherwise be assigned to scraping.
Step 16: Avoid Popular Cleaning Tricks That Conflict With the Manual
Kitchen-cleaning advice spreads quickly online because dramatic before-and-after results photograph well.
Appliances do not care about photographs.
Methods involving large quantities of water inside the cooking chamber, harsh oven cleaners, metal tools, improvised steam-cleaning cycles or chemical mixtures should not override manufacturer instructions.
One particularly poor habit is filling an air-fryer basket with cleaning solution and running a cooking cycle unless the manufacturer explicitly instructs users to do so.
Heating detergent is not the same process as washing a removable basket in a sink.
The fan can distribute aerosolized material through areas never intended to receive cleaning solution.
Likewise, spraying cleaner directly toward heating elements or fan openings trades visible grease for invisible electrical risk.
The manual remains the controlling document.
Step 17: Do Not Assume Baking Soda and Vinegar Are Magic Together
Baking soda and vinegar have each acquired near-mythical status in household cleaning.
Mixed together, however, an acid-base reaction causes them to neutralize one another substantially while producing carbon dioxide.
The fizz looks energetic.
Appearance should not be confused with cleaning performance.
Either substance may have particular cleaning uses on compatible surfaces, but air-fryer materials complicate the decision. Aluminum, coatings, stainless steel, silicone, glass and painted surfaces can respond differently to chemicals and abrasion.
A mild dish detergent recommended by the manufacturer is generally a more predictable starting point.
There is little reason to conduct a chemistry demonstration inside an expensive electrical appliance.
Step 18: Dry Components Completely
Cleaning does not end at rinsing.
Water remaining beneath a crisper plate, around a basket seam or on an accessory can create spotting, encourage corrosion on susceptible components or simply carry moisture back into areas where it is unwanted.
Ninja’s AF100 instructions direct users to air-dry or towel-dry parts after use.
Air fryer toaster oven racks and trays should likewise be dried according to manufacturer guidance.
The powered housing should never be reassembled around dripping components.
Drying is particularly important after dishwasher cleaning because water can collect in seams and recesses that appear dry from above.
A brief inspection before reassembly takes seconds.
Step 19: Reassemble the Appliance Carefully
Once everything is clean and dry, return each component to its intended location.
Crisper plates should sit correctly inside baskets.
Silicone feet or bumpers should remain positioned as designed.
Crumb trays should slide fully into place.
Oven racks belong in the correct orientation.
Air-fry baskets should not be stored where they interfere with heating elements or door closure.
This stage can reveal maintenance problems.
A warped tray, peeling coating, cracked basket, damaged silicone component or door that no longer closes properly deserves attention before the next high-temperature cycle.
Cleaning creates an opportunity to inspect the machine when food is not hiding its surfaces.
Step 20: Use a Cleaning Schedule Based on What Was Cooked
A rigid calendar is less useful than a food-based cleaning schedule.
After greasy chicken wings, bacon or heavily marinated meat, substantial cleaning may be necessary immediately.
After dry toast, the job may consist largely of emptying crumbs.
A practical routine looks like this:
After Every Use
- Remove obvious crumbs and food debris.
- Wash food-contact baskets or trays as needed.
- Empty the crumb tray on toaster-oven models.
- Wipe fresh spills before they are reheated.
- Inspect for grease near accessible heating areas.
After Greasy Cooking
- Wash the basket and crisper plate thoroughly.
- Inspect the chamber for splatter.
- Clean mesh baskets and drip trays.
- Wipe door glass if grease has accumulated.
- Check the heating area according to the manual.
Periodically
- Inspect vents for external dust or obstruction.
- Examine basket coatings and silicone components.
- Clean door edges and handles.
- Check racks and tray corners for hardened deposits.
- Inspect the power cord for visible damage.
- Review areas that routine wiping does not reach.
The frequency should follow actual use.
An appliance running twice a day needs a different maintenance rhythm from one used twice a month.
Why Smoke Is Often a Cleaning Message
Unexpected smoke can have several causes, including fatty foods, residue near heating elements or old grease being reheated.
Cleaning history is therefore one of the first variables to examine.
A spotless basket does not rule out residue elsewhere.
Air fryer toaster ovens can hide grease on the ceiling, side walls, crumb tray and around racks. Basket models can accumulate splatter near upper heating areas.
If an appliance suddenly smokes during foods that previously cooked without difficulty, old residue deserves investigation after the machine is switched off, unplugged and cooled.
Persistent abnormal smoke, electrical odors, sparking or signs of component damage should not be treated as routine dirt. Operation should stop and the manufacturer or qualified service channel should be consulted.
Cleaning solves residue.
It does not repair electrical faults.
Cleaning Frequency Affects More Than Appearance
A clean air fryer is easier to inspect.
Damage becomes visible. New leaks or unusual residue stand out. Old flavors are less likely to migrate into new food. Smoke from previous meals is reduced.
Cleaning also makes the next cleaning easier.
That compounding effect works in both directions.
Grease left behind becomes heated again. Reheated grease becomes harder to remove. Harder residue encourages more aggressive cleaning. Aggressive cleaning can damage surfaces.
A few minutes after ordinary use can therefore prevent an hour of restoration later.
This is maintenance economics at countertop scale.
Basket Air Fryer vs. Air Fryer Toaster Oven: Which Is Easier to Clean?
The basket air fryer usually wins on component count.
A typical model asks the user to clean one basket, one crisper plate and portions of the main chamber.
The air fryer toaster oven presents more territory: crumb tray, racks, mesh basket, baking tray, interior walls, glass and heating areas.
Yet the toaster oven can offer better visual access to some surfaces.
The basket model concentrates grease in a smaller space but may hide residue around an upper heating assembly. The oven spreads residue across a larger cavity but opens broadly from the front.
Cleaning difficulty therefore has two dimensions: number of parts and accessibility.
A buyer evaluating the best air fryers should look beyond dishwasher-safe labels. The more revealing questions are whether grease traps are removable, whether the heating area can be maintained safely and whether large accessories fit the household’s sink or dishwasher.
A Minimal Cleaning Kit
Air fryer maintenance does not require an arsenal of specialty chemicals.
For many models, an effective basic kit consists of:
- Mild dishwashing liquid
- Soft non-abrasive sponges
- Microfiber cloths
- A soft cleaning brush
- A small brush for mesh and corners
- Clean drying towels
Any additional cleaner should be compatible with the specific surface and permitted by the manufacturer.
Abrasive powders, metal pads and aggressive oven chemicals should never be assumed safe.
Simple tools have another advantage: they make frequent cleaning less burdensome.
The easier the equipment is to reach, the less likely grease is to become archaeology.
Final Considerations
Cleaning an air fryer is not difficult when residue is removed before repeated heating transforms it.
The most effective routine begins with restraint rather than force.
The appliance is unplugged. It cools. Removable components are separated from the powered housing. Loose crumbs leave before water arrives. Food-contact components are washed according to their material and manufacturer instructions. Stubborn residue soaks instead of being attacked with metal tools. The fixed housing receives controlled moisture rather than immersion.
Basket air fryers concentrate most of the work in the basket and crisper plate. Those components deserve cleaning after messy cooking because grease and food residue can quickly become harder deposits.
Air fryer toaster ovens distribute the job across more surfaces. Their crumb trays require particular discipline. Racks, mesh baskets, glass doors and cavity walls add work, but regular light maintenance prevents those areas from developing layers of baked-on grease.
Food safety adds another reason for consistency. Government guidance calls for hot, soapy water on dishes and utensils after contact with raw meat, poultry, seafood or eggs, alongside careful hand washing and separation of raw and cooked foods. An air fryer does not isolate the kitchen from those rules merely because food cooks inside a compact chamber.
Fire safety points in the same direction. The U.S. Fire Administration explicitly advises keeping cooking equipment clean because accumulated grease and crumbs can burn.
None of this requires turning routine cleanup into appliance restoration.
That is precisely the point.
A basket washed while residue is fresh rarely needs aggressive treatment. A crumb tray emptied after dinner does not become a carbonized archive of previous meals. A glass door wiped regularly remains a window rather than a grease filter.
The manufacturer’s manual should remain the final authority whenever materials or cleaning methods are uncertain. Dishwasher compatibility, heating-element access, coating care and approved cleaners vary between machines.
The practical sequence stays remarkably stable across designs: unplug, cool, empty, wash, wipe, dry and inspect.
Cleaning after use asks for minutes. Cleaning after months of neglect can ask for an afternoon-and sometimes a replacement part.