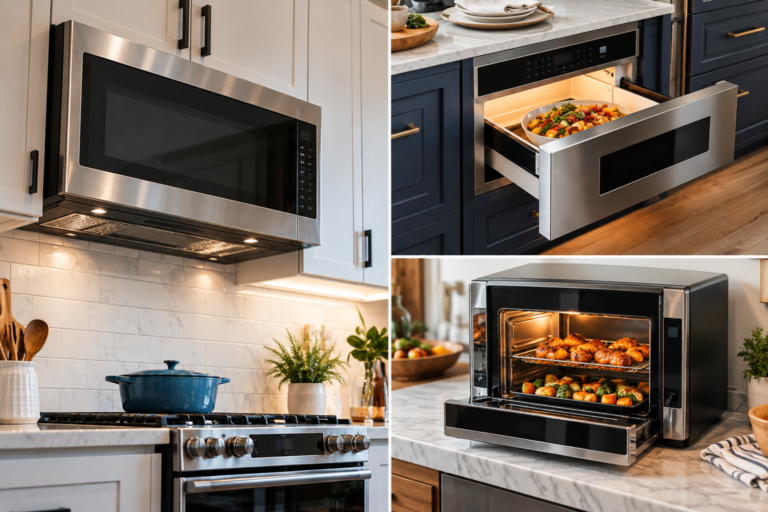
Replacing an over-the-range microwave looks deceptively simple. The old appliance is roughly 30 inches wide, the new one is roughly 30 inches wide, and both belong above a range. That apparent standardization encourages a costly assumption: if the widths match, the replacement will fit.
Width is only the beginning.
An over-the-range microwave is simultaneously a cooking appliance, range hood, wall-mounted load, electrical appliance and, in many kitchens, part of an exhaust system. Its installation is governed not only by the dimensions of the metal box but also by cabinet geometry, mounting height, door swing, wall construction, electrical access and duct position. Even two nominally 30-inch microwaves can use different brackets, bolt locations and ventilation arrangements.
The measuring process should therefore document the installation space rather than merely copy dimensions from the old microwave.
That distinction is the foundation of an effective microwave buying guide. The question is not simply, “How big is the old microwave?” It is, “What dimensions and connections must the replacement work with?”
Start With the Installation Space, Not the Old Microwave
The most reliable measurements come from the kitchen.
An existing microwave can provide useful reference dimensions, but measuring only the appliance risks preserving assumptions from the previous installation. Cabinets may not be perfectly square. The microwave may protrude significantly beyond them. A backsplash may reduce usable wall depth. A cabinet side panel can interfere with the door.
The installation opening exposes those constraints.
For a replacement, record at least:
- Cabinet-to-cabinet opening width
- Upper-cabinet depth
- Distance from the cooking surface to the bottom of the upper cabinet
- Existing microwave height
- Existing microwave depth
- Distance from the floor to the relevant mounting level
- Clearance beside the door hinge
- Exhaust location and dimensions
- Electrical receptacle location
- Upper-cabinet interior dimensions
- Position of wall studs where accessible
Measurements should be taken in more than one place where practical. A nominal 30-inch opening can vary slightly from front to back or top to bottom because cabinetry and walls are not always perfectly aligned.
The smallest usable dimension is generally the one that matters.
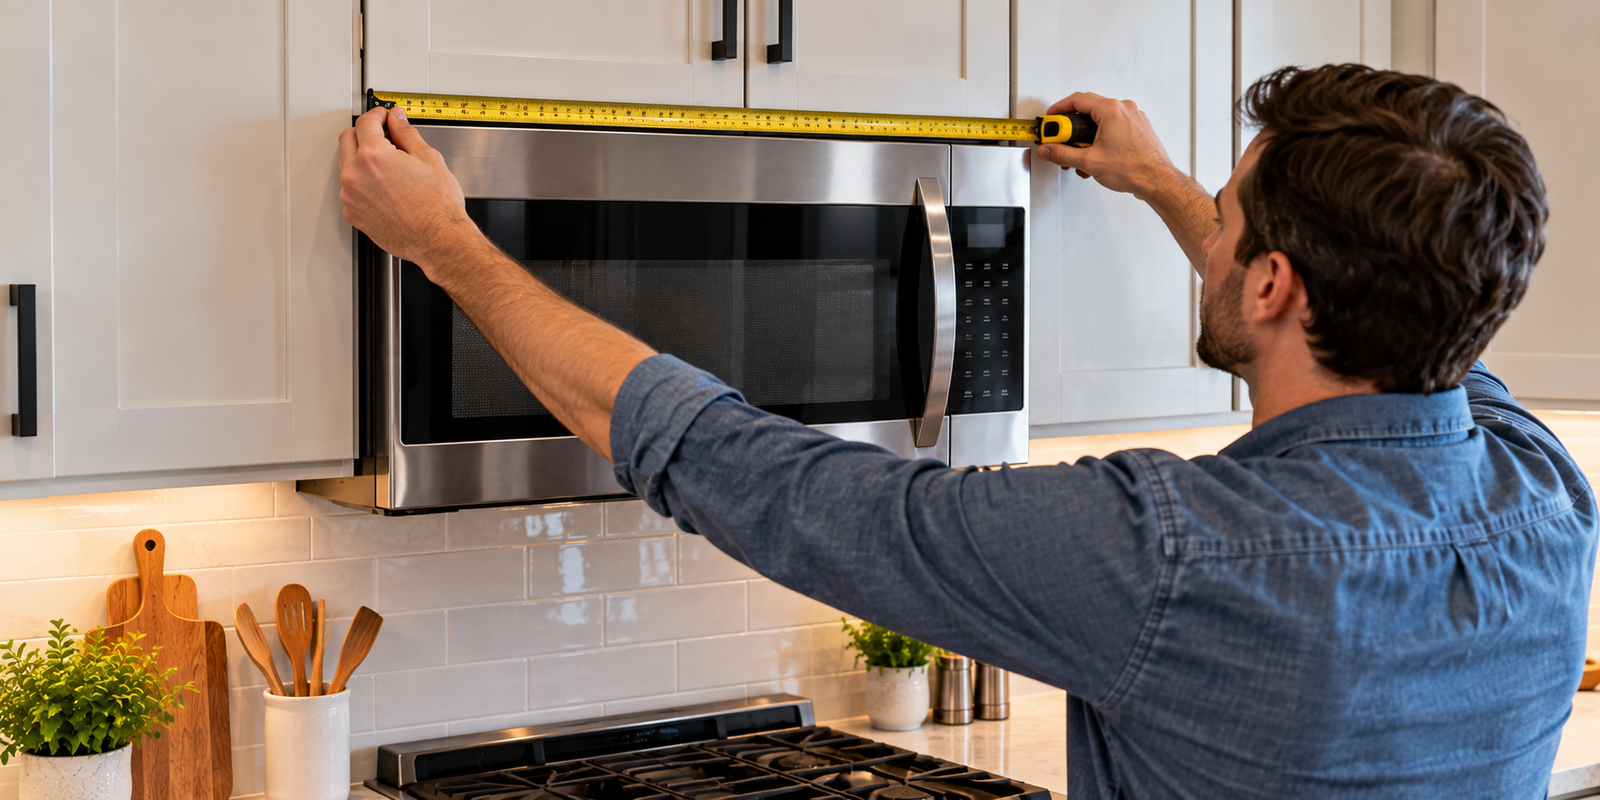
Step 1: Measure the Cabinet Opening Width
Begin by measuring horizontally between the cabinets on the left and right sides of the microwave.
Do not measure cabinet face frame to cabinet face frame if projections or trim reduce the actual opening. The tape should represent the space available to the appliance.
Thirty inches is a common reference dimension. GE states that its current 30-inch over-the-range models are designed for a 30-inch-wide cabinet opening and notes that the dimensions of this product category have remained relatively consistent. Its replacement guidance for over-the-range microwaves also explains that current 30-inch models are designed as replacements for previous 30-inch installations.
That does not make every 30-inch microwave interchangeable.
A product described as 30 inches wide may have an actual appliance width slightly below 30 inches so that it can physically enter the opening. Installation requirements, hinge clearances and cabinet conditions still need to match.
Measure the opening at the front and near the rear if possible. If one measurement is 30 inches and another is 29¾ inches, the smaller dimension cannot be ignored.
For an existing 36-inch opening, the problem changes. Some 30-inch appliances can be installed with model-specific filler panels, but a filler kit should be confirmed for the replacement rather than assumed to exist.
Step 2: Measure From the Cooktop to the Upper Cabinet
Next, measure vertically from the cooking surface to the underside of the cabinet directly above the microwave.
This is one of the most consequential measurements because it establishes the total zone available for the microwave and the space beneath it.
GE’s installation-clearance guidance specifies 66 inches from the floor to the bottom of the cabinet to which its over-the-range microwave attaches, also describing this as 30 inches from the cooktop surface to that cabinet bottom in the installation arrangement covered by the guidance.
Manufacturer-specific instructions control, however. The required relationship between the range, cabinets and microwave can vary with appliance design and cooking equipment.
That is why the buyer should record the raw kitchen measurements before selecting a model.
Suppose the cooktop-to-cabinet distance is 30 inches. A replacement microwave 17 inches tall would leave approximately 13 inches between the cooking surface and microwave body if mounted directly beneath the cabinet. A 10-inch-tall low-profile appliance would leave substantially more working space.
The cabinet opening can therefore accept both appliances dimensionally while producing very different clearances over the cooking surface.
Step 3: Measure the Existing Microwave Height
Measure the old microwave vertically from its highest body surface to its lowest point, excluding loose accessories.
This number is useful primarily as a comparison.
A replacement does not necessarily need the same height. In fact, changing height can be beneficial when the existing microwave hangs unusually low.
Conventional over-the-range models are often taller than low-profile designs. Maytag describes many over-the-range models as approximately 30 inches wide, 17 inches high and 15 to 18 inches deep, while also identifying smaller low-profile designs as a separate category.
A shorter appliance creates more open space above the cooking surface, but it can also reveal unfinished backsplash, old mounting holes, paint differences or other evidence of the previous installation.
That aesthetic detail is easily overlooked during measurement.
Before buying a shorter replacement, inspect the wall behind and below the current microwave. If tile stops exactly at the old appliance, reducing microwave height may expose an unfinished strip.
Fit is partly dimensional and partly architectural.
Step 4: Measure Cabinet Depth
Measure from the rear wall to the front edge of the upper cabinet.
Do not substitute the countertop depth. The relevant dimension is the cabinet directly above the microwave.
Cabinet depth can create problems even when width and height look ideal. GE’s current replacement guidance describes a 12-inch minimum to 13-inch maximum cabinet depth for the conventional installation it documents. For deeper cabinetry, some models require additional installation hardware.
GE, for example, documents a bump-out kit for installations involving deeper cabinets. Its kit moves compatible microwaves forward to accommodate that geometry.
This illustrates why cabinet depth should never be inferred from appearance.
Modern kitchen cabinetry can be deeper than older standard installations, particularly after renovations involving decorative panels, oversized doors or custom millwork.
Record the actual depth to at least the nearest eighth of an inch where possible.
Step 5: Measure Microwave Depth Separately
Now measure how far the existing microwave projects from the rear wall.
This measurement is different from cabinet depth.
An over-the-range microwave commonly extends beyond the face of the cabinets. That projection can be intentional because the door, ventilation system and controls need usable space.
Whirlpool’s microwave comparison information illustrates how dimensions can vary across the category, making the exact depth of the proposed appliance worth checking rather than assuming it will match the old unit.
A replacement that is several inches deeper than the existing appliance may technically fit but change the kitchen noticeably.
Greater projection can:
- Bring the appliance closer to a user’s face while cooking.
- Make rear burners harder to see.
- Alter access to tall pots.
- Change the visual relationship with surrounding cabinets.
- Affect door clearance near a side wall.
- Increase how prominent the appliance appears in the room.
Depth is therefore both an installation measurement and an ergonomic one.
Step 6: Check Door-Swing Clearance
The microwave door deserves its own measurement.
A unit can fit perfectly between cabinets and still become irritating-or impossible-to use if its door strikes an adjacent wall, refrigerator panel or deep cabinet.
Identify which side contains the hinge on the proposed replacement and measure the available space beside it.
GE states that its current over-the-range models installed beside a deep cabinet or wall on the left hinge side require ½ inch of clearance for the door to open. Other designs can require different spacing, so the installation drawing for the specific model remains the controlling document.
This is particularly relevant in corner installations.
A microwave located against a normal cabinet run may have generous door movement. The same appliance installed with its hinge beside a perpendicular wall can behave completely differently.
Measure the obstruction, not merely the cabinet opening.
Step 7: Document the Ventilation Configuration
An over-the-range microwave is also a ventilation appliance, and replacing one without identifying the existing airflow path is an avoidable source of installation trouble.
There are generally three arrangements to investigate:
- Vertical exhaust through the cabinet and upward.
- Horizontal exhaust through the rear wall.
- Recirculating operation in which filtered air returns to the kitchen.
Remove items from the upper cabinet and look for ductwork. A rectangular or round duct passing upward is obvious evidence of vertical exhaust. Rear-wall exhaust may require closer inspection after the old microwave is removed.
If no exterior duct exists, the existing appliance may be operating in recirculation mode.
The distinction matters because the new microwave has to be configured for the correct airflow path.
GE’s ducting guidance for over-the-range microwaves specifies rigid 3¼-by-10-inch rectangular or rigid 6-inch round ducting for its documented installations and states that its microwaves can vent vertically or horizontally. It also warns against exhausting into an attic or crawl space.
Those figures should not be transferred automatically to another manufacturer’s appliance. They illustrate the type of specification that must be checked before purchase.
Measure existing duct width, height or diameter and record its position relative to the cabinet centerline.
A photograph with a tape measure visible can be particularly useful when comparing installation drawings later.
Step 8: Locate the Electrical Receptacle
Open the cabinet above the microwave and identify the receptacle.
Record where it sits relative to the cabinet walls and note where the microwave’s existing power cord enters the cabinet.
This seems mundane until a new appliance places its cord on the opposite side.
Over-the-range microwaves commonly route the cord upward through an opening in the cabinet bottom. The replacement’s installation template establishes the proper hole location.
The existing hole should not automatically determine the new installation.
Maytag’s installation procedure specifically instructs installers to align the supplied upper-cabinet template and use it to locate the power-cord opening. Its installation overview also recommends another person assist with lifting and mounting the appliance.
Record the receptacle position before shopping, but plan to follow the replacement appliance’s instructions when routing its cord.
Step 9: Do Not Assume the Old Mounting Bracket Will Work
One of the easiest replacement mistakes occurs behind the appliance, where the mounting bracket is largely invisible.
Two microwaves can share almost identical exterior dimensions and use different wall plates.
GE explicitly instructs customers replacing an over-the-range microwave to use the mounting bracket supplied with the new model because the bracket is model-specific. It likewise advises using the new screws, bolts and exhaust adapter.
That instruction captures a broader principle: exterior dimensions do not establish mounting compatibility.
Before installation, expect the old bracket to come off.
The new microwave’s rear template or mounting plate should establish the correct drilling locations. GE notes in its guidance on top and rear templates that its over-the-range products use templates to locate mounting holes and openings for the vent and power cord.
Old holes can occasionally coincide with new ones, but coincidence is not a mounting specification.
Step 10: Locate Wall Studs
An over-the-range microwave transfers significant load into the wall and upper cabinet.
Wall construction therefore belongs in the measuring process.
Before installation, identify the approximate stud positions behind the appliance using a stud finder or existing construction information. Do not drill exploratory holes where electrical wiring, plumbing or gas lines could be present.
Maytag’s installation instructions state that the microwave needs at least one wall stud for the installation procedure it describes and calls two studs ideal. The requirements for the selected appliance should be followed exactly.
Stud position is especially useful information when the previous installation appears improvised or when the kitchen has undergone remodeling.
A microwave is not merely resting in a cabinet opening. Its support system is part of the fit.
Step 11: Check the Upper Cabinet Interior
The outside of the cabinet can look spacious while the inside presents obstacles.
Empty it and inspect for:
- Fixed shelves
- Face-frame lips
- Reinforcing rails
- Electrical boxes
- Duct transitions
- Plumbing from adjacent construction
- Previous mounting holes
- Uneven cabinet bottoms
- Decorative trim
Measure usable interior depth and width where bolts, ductwork and the power cord will pass.
A fixed shelf can interfere with ductwork even when the microwave itself fits perfectly below. Likewise, an unusually thick cabinet bottom can affect the hardware arrangement specified by the manufacturer.
This is where measuring becomes investigative rather than mechanical. The objective is to find the obstruction before the old appliance is on the floor and the new one is halfway into position.
Step 12: Compare Measurements With the Installation Drawing
Once the kitchen measurements are recorded, compare them with the installation instructions for the exact model being considered.
Do not rely solely on retail dimensions.
Product dimensions answer, “How large is the appliance?”
Installation drawings answer the more useful question: “What space does this appliance require?”
The comparison should cover:
| Measurement | Kitchen | Replacement Requirement |
|---|---|---|
| Opening width | Record actual | Check manual |
| Cooktop-to-cabinet distance | Record actual | Check manual |
| Cabinet depth | Record actual | Check manual |
| Appliance height | Existing and proposed | Compare |
| Appliance depth | Existing and proposed | Compare |
| Hinge-side clearance | Record actual | Check manual |
| Vent size | Record actual | Check manual |
| Vent location | Record actual | Check template |
| Receptacle location | Record actual | Check template |
| Stud positions | Record approximate | Check mounting instructions |
The process takes longer than measuring width alone, but it can expose nearly every major fit problem before purchase.
Why the Old Microwave’s Dimensions Are Not Enough
Replacement shopping often starts with the model number of the existing microwave. That is useful. Older documentation can reveal exterior dimensions and installation details.
Yet matching those dimensions exactly is unnecessary in many installations.
A replacement can be slightly taller, shorter or deeper while still fitting safely. Conversely, a microwave with nearly identical exterior dimensions can require cabinet modifications because its mounting holes, exhaust adapter or door geometry differ.
The installation envelope is more informative than the old appliance’s shell.
That is why a good microwave buying guide should distinguish between four separate ideas:
- Appliance dimensions.
- Cabinet-opening dimensions.
- Required operating clearances.
- Mounting and utility locations.
Confusing any two can create a replacement problem.
Special Case: Replacing a Standard Microwave With a Low-Profile Model
Low-profile over-the-range microwaves can solve a specific spatial problem: insufficient room between a conventional-height microwave and the cooking surface.
Their reduced height can recover several inches of vertical working area.
But the change can expose previously hidden surfaces.
A shorter replacement may reveal:
- Unfinished drywall
- Missing backsplash tile
- Grease discoloration
- Old screw holes
- Paint lines
- Duct openings
- Electrical penetrations
Measure the exposed-wall area before committing to the change.
A dimensional improvement can create a finishing project.
The ventilation path should also be checked carefully because the exhaust outlet of a shorter appliance may not align with existing ductwork in precisely the same way.
Special Case: Deep Cabinets
Deep upper cabinets deserve extra scrutiny because the microwave may need to project farther forward.
A deeper cabinet can interfere with ventilation or door movement depending on the appliance. Manufacturer-specific accessories sometimes address the problem, but compatibility needs to be confirmed for the exact model.
This is one reason a cabinet-depth measurement should appear near the beginning of the process rather than after purchase.
The cabinet may look conventional while measuring 14, 15 or more inches deep.
An extra two inches of cabinetry can change the installation substantially.
Special Case: Gas Cooking Equipment
A microwave replacement above a gas range should not be treated as a microwave-only project.
The specifications of the cooking appliance below matter as well.
Burner configuration, heat output and the range manufacturer’s clearance requirements can affect what may be installed overhead. GE, for example, publishes separate guidance for over-the-range products installed above gas cooking equipment and directs users to the specific installation instructions for applicable products.
When the range and microwave come from different manufacturers, both sets of installation requirements deserve review.
Where instructions conflict or the installation falls outside published conditions, qualified installation assistance is the safer route than improvising a compromise.
A Simple Measurement Worksheet
Before shopping, the following record can be written on paper or stored on a phone:
- Opening width: ______
- Upper-cabinet depth: ______
- Cooktop to upper-cabinet bottom: ______
- Floor to upper-cabinet bottom: ______
- Existing microwave width: ______
- Existing microwave height: ______
- Existing microwave depth: ______
- Existing projection beyond cabinet face: ______
- Hinge-side obstruction distance: ______
- Exhaust type: vertical / rear / recirculating
- Duct dimensions: ______
- Duct position from centerline: ______
- Receptacle position: ______
- Power-cord hole position: ______
- Wall-stud locations: ______
- Backsplash height: ______
- Finished wall behind existing microwave: yes / no
Photographs should accompany the measurements.
Useful photographs include the full appliance wall, cabinet interior, receptacle, duct, underside of the upper cabinet, left and right side clearances, and the area behind the microwave after removal.
These images can reveal details that a handwritten dimension misses.
Common Measuring Mistakes
Several errors recur because they seem reasonable at first.
Measuring only the old microwave is the first. The opening matters more.
Assuming “30-inch microwave” means exactly 30 inches wide is another. Nominal product classes and actual dimensions are not interchangeable.
Ignoring depth is equally risky. A microwave can fit between the cabinets while projecting much farther into the kitchen than expected.
Reusing the old wall bracket without checking compatibility can turn a straightforward replacement into an unsafe installation.
Another mistake is treating ventilation as an afterthought. Duct direction, dimensions and location should be documented before purchase.
Finally, buyers sometimes measure clearance from the countertop rather than the cooking surface. Those are not necessarily the same height. The relevant manufacturer dimension must be measured from the reference point identified in the installation instructions.
Precision is less about owning an expensive tape measure than measuring the correct objects.
When Professional Installation Makes Sense
A direct replacement in a correctly prepared opening can be relatively straightforward for someone experienced with appliance installation.
The project becomes materially different when it involves moving electrical service, altering ductwork, cutting cabinetry, working around gas connections, correcting inadequate structural support or resolving unclear clearances.
Those conditions cross from appliance replacement into building systems.
Even a mechanically experienced homeowner should recognize that lifting the microwave is itself a two-person operation in many manufacturer procedures. The appliance must be raised, engaged with a rear bracket, rotated into position and secured through the upper cabinet while the power cord is routed correctly.
The installation instructions, rather than confidence alone, should determine the process.
Final Considerations
Measuring for an over-the-range microwave replacement is not a one-number exercise.
The familiar 30-inch width is useful, but it can create false confidence. A successful replacement also depends on cabinet depth, appliance height, cooktop clearance, door movement, mounting hardware, wall support, duct geometry and electrical access.
The process works best in a deliberate order: measure the cabinet opening, establish vertical space above the cooking surface, record cabinet and appliance depth, inspect the hinge side, identify the exhaust route, locate electrical service, map the upper cabinet and then compare every relevant measurement with the installation drawing for the exact replacement model.
The old microwave should be treated as evidence, not as the blueprint.
Its dimensions show what has been installed before. Its duct and receptacle reveal existing infrastructure. Its mounting holes reveal previous construction. But the replacement brings its own bracket, templates, clearances and connection points.
That distinction explains why two appliances that look almost identical on a specification page can produce very different installation experiences.
A tape measure used for ten careful minutes before purchase can expose problems that would otherwise emerge while a heavy microwave is being held above a stove. Width starts the investigation. Height, depth, clearance, ventilation, electrical access and structural support finish it.
For an over-the-range microwave replacement, accurate measurement is not simply a way to determine whether the appliance fits between two cabinets. It establishes whether the entire installation-appliance, cabinetry, range, wall, power and airflow-fits together as a functioning system.