An air fryer can produce an impressively brittle crust, browned edges and the audible crackle associated with frying, but those results are not automatic. When air-fried food emerges pale, leathery or mysteriously damp, the appliance is often blamed. More often, the problem lies in moisture management, airflow, surface preparation or the sequence in which heat reaches the food.
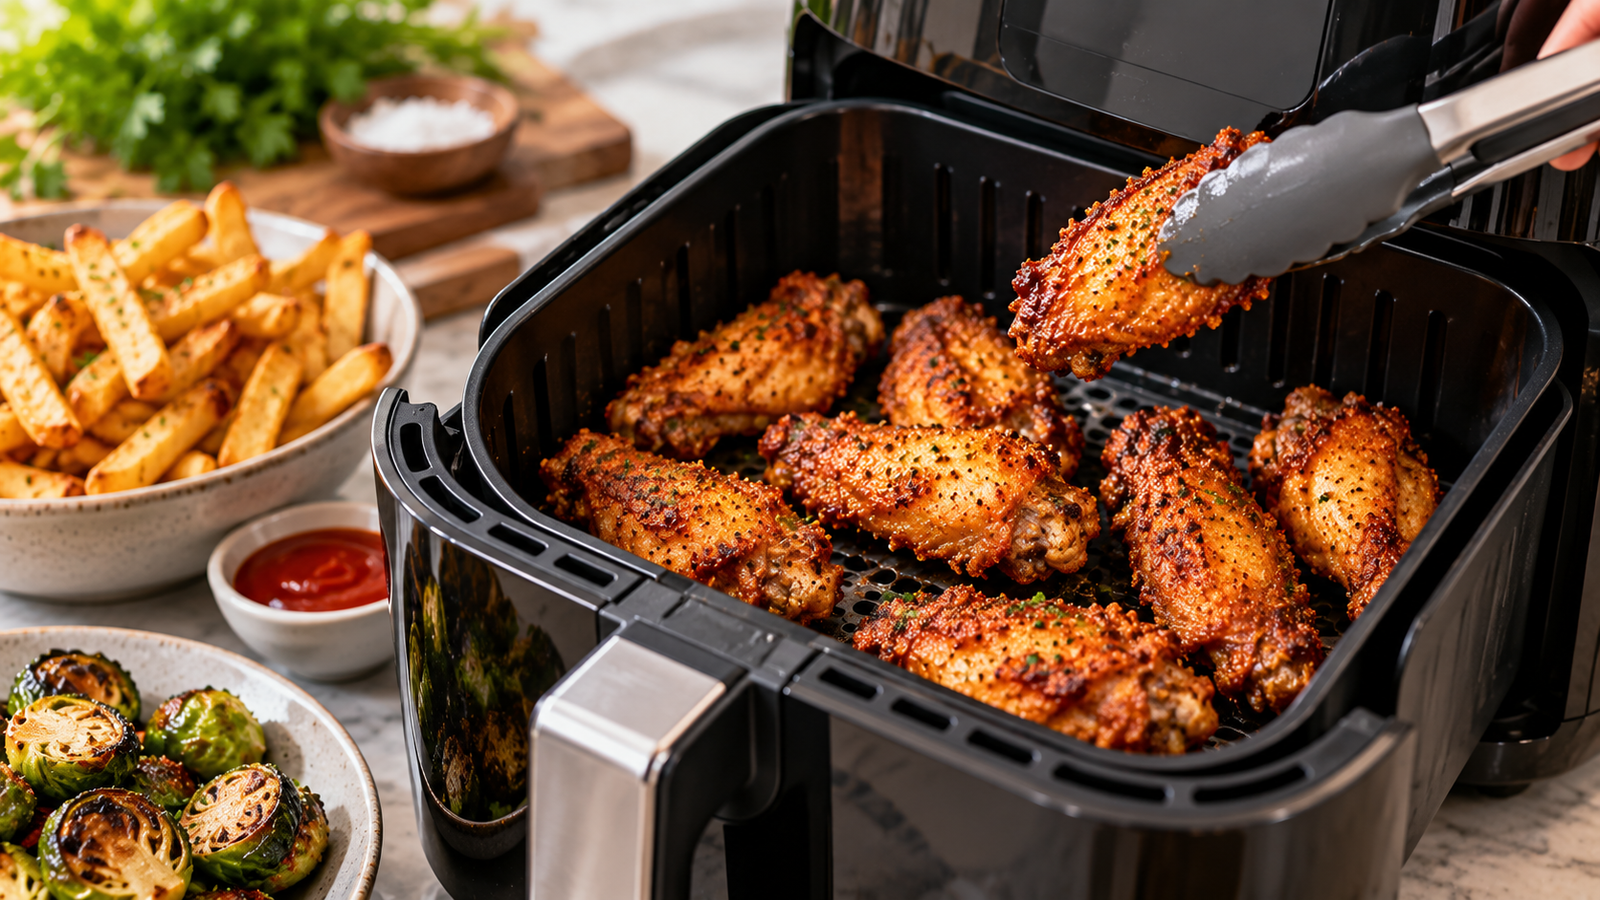
That distinction matters because an air fryer is not a miniature vat of hot oil. The U.S. Department of Agriculture describes air fryers as essentially countertop convection ovens in which rapidly circulating hot air cooks and crisps food. USDA guidance places typical air-frying temperatures between 350°F and 400°F, or roughly 177°C to 204°C, with many foods cooking in approximately 5 to 25 minutes.
The practical challenge is therefore straightforward: air has to remove enough water from the food’s exterior, quickly enough, for a dry and rigid crust to develop before the interior becomes overcooked.
Research on French fries helps explain the difference. A 2015 study comparing air frying with deep-fat frying found that air-fried fries took about 21 minutes under the experimental conditions, compared with 9 minutes for conventional frying. The researchers reported slower temperature development and lower rates of moisture loss during air frying.
Crispness, in other words, is largely a battle against surface water-and hot circulating air needs help winning it.
Why Air-Fried Food Becomes Crisp
Crisp food is not merely food that has become hot or brown. Texture depends on structural changes near the surface.
As food heats, moisture migrates outward and evaporates. The outer region becomes progressively drier while starches, proteins and other components undergo physical and chemical changes. A rigid, porous crust can form. When that structure fractures under the teeth, the result is perceived as crispness.
Research examining French-fry crusts using X-ray micro-computed tomography found that crust microstructure is closely related to sensory crispness. Smaller pores and a broad distribution of pore sizes in the crust correlated with greater perceived crispness. Another study found that lower final moisture content increased the formation of larger pores and that greater porosity was associated with crispier behavior under the conditions tested.
This explains why simply adding another five minutes of cooking is not always effective. The objective is not merely to heat food longer. It is to create conditions that encourage efficient evaporation and crust formation while avoiding excessive dehydration of the interior.
That requires controlling several variables before the basket is even switched on.
Step 1: Remove Surface Moisture Aggressively
For many foods, the simplest crispness improvement happens at the kitchen counter.
Fresh potatoes, chicken skin, tofu, vegetables and thawed foods frequently carry visible or microscopic surface moisture. That water must evaporate before the exterior can become substantially drier and begin browning efficiently.
A wet surface therefore creates an immediate handicap.
Potatoes illustrate the point particularly well. Washing or soaking cut potatoes can remove surface starch and can be useful for certain preparations, but the pieces should be thoroughly dried afterward. The U.S. Food and Drug Administration recommends draining and blotting soaked potatoes dry before high-temperature cooking. Its guidance also states that soaking raw potato slices in water for 15 to 30 minutes before frying or roasting can help reduce acrylamide formation.
The two instructions are complementary: soak when appropriate, then dry thoroughly.
After washing vegetables, a salad spinner followed by a clean towel can remove far more water than casual draining. Tofu benefits from pressing. Chicken skin should be blotted dry. Thawed frozen foods should not enter the basket sitting in a puddle of meltwater.
Surface moisture is not a minor cosmetic issue. Every gram of water sitting outside the food represents water that the appliance must remove before that area can develop the dry structure associated with crispness.
Step 2: Give the Air Fryer Time to Get Hot
Preheating is sometimes treated as optional because an air fryer reaches temperature relatively quickly. For crispness-sensitive foods, however, placing food into an already hot cooking chamber can improve the opening stage of cooking.
The reason is thermal momentum.
Cold food placed into a cold appliance spends its first minutes warming alongside the chamber. During that period, moisture can migrate toward the exterior while the surface remains too cool for rapid drying and browning.
Starting hot changes that sequence. The exterior immediately encounters a stronger temperature gradient and fast-moving heated air.
Not every recipe requires preheating, and appliance instructions take precedence because air-fryer designs vary. But for fries, breaded foods, chicken wings and foods intended to develop a dry crust, a short preheat is a rational default when the manufacturer permits it.
This is also one reason comparisons among the best air fryers cannot be reduced to maximum temperature alone. Basket geometry, fan design, heater response, usable cooking area and air circulation affect how heat reaches the food. A nominal 200°C setting does not guarantee identical cooking behavior across different appliances.
Step 3: Use a Small Amount of Oil Strategically
The phrase “air fryer” can create the mistaken impression that oil has no place in the process. For many fresh foods, a small and evenly distributed quantity can improve browning, surface heat transfer and the sensory qualities of the crust.
The distinction is quantity.
Deep frying surrounds food with hot oil. Air frying relies primarily on hot air and can therefore use dramatically less added fat in suitable preparations. Published experiments confirm that the two methods transfer heat and moisture differently.
A 2015 comparison reported substantially lower fat content in air-fried fries while obtaining similar moisture content and color characteristics, although air frying required considerably longer cooking. More recently, a 2026 laboratory study reported approximately 1.2% oil content in fries air-fried at 140°C for 5 to 25 minutes, compared with 44.8% under the study’s deep-frying treatment. Those figures describe the specific experimental methods and should not be treated as universal values for every recipe or appliance.
For home cooking, the useful lesson is narrower: oil should generally be treated as a thin surface treatment rather than a bath.
A light coating is preferable to random puddles. Tossing food with a measured amount of oil before cooking usually distributes it more evenly than pouring oil directly into the basket. A fine mist can work for irregular surfaces, provided the oil and spray method are compatible with the appliance manufacturer’s instructions.
Too much oil can undermine the objective. Excess liquid collects on surfaces, fills spaces in coatings and can leave food greasy rather than brittle.
Step 4: Stop Crowding the Basket
Few air-fryer mistakes are as consequential as overcrowding.
The appliance relies on moving air. When pieces are packed into a dense pile, that moving air cannot contact every surface equally. Pieces shade one another from the airflow, moisture accumulates locally, and contact points behave more like steaming zones than dry roasting surfaces.
USDA air-fryer guidance explicitly warns against overfilling the basket because doing so can contribute to uneven or insufficient cooking.
The crispness problem appears even before food safety becomes an issue.
A single layer with some exposed space around the food generally produces more even drying. That does not mean every piece requires a large moat of empty basket. It means the food should not form a compact mass that blocks circulation.
This creates an apparent paradox: a smaller batch can sometimes finish faster than an overloaded one. Two smaller batches may also produce substantially better texture than one enormous batch because the appliance can actually perform the convection process for which it was designed.
Capacity should therefore be judged by usable surface area, not merely by how much food can physically be squeezed into the basket.
Step 5: Build Breading for Air, Not for a Deep Fryer
Wet batter behaves differently in an air fryer because there is no surrounding oil to set it instantly.
A loose batter that works beautifully in deep frying may drip through the basket, remain pasty or develop irregular bald patches when exposed primarily to moving air.
Dry or semi-dry coatings are usually more predictable.
Flour, starch, breadcrumbs and crushed dry coatings create exposed surfaces that can dehydrate rapidly. Cornstarch or potato starch can be particularly useful in thin coatings because starch forms a dry exterior readily when moisture is driven away.
For breaded foods, the coating should adhere firmly before cooking. A typical sequence of flour, a wet binding layer and breadcrumbs can work well, but excessive wetness should be avoided. The outside can then receive a very light coating of oil.
The goal is not to imitate deep frying mechanically. It is to engineer a surface that hot air can dry.
That difference explains many failed attempts to transfer conventional frying recipes directly into an air fryer without modification.
Step 6: Shake, Flip or Rotate at the Right Moment
Airflow inside an air fryer is powerful but not perfectly uniform.
Basket edges, food geometry and the location of the heating element can produce hotter and cooler zones. Food resting against the basket also has a contact surface that receives air differently from its exposed side.
Movement corrects some of those inequalities.
Fries and small vegetables can be shaken. Wings, cutlets and larger pieces generally benefit from turning. The objective is to expose previously shielded surfaces to circulating air.
Timing matters. Constantly opening the basket interrupts cooking and releases heat. Never moving the food, however, can leave one side considerably less dry.
For many foods, one intervention around the midpoint is a sensible starting point. Small loose pieces can sometimes benefit from an additional shake later in cooking. The exact timing should follow the food and appliance rather than an inflexible rule.
Step 7: Use Temperature as a Texture Control
Maximum temperature is not automatically maximum crispness.
High heat accelerates surface drying and browning, but an exterior can darken before the interior is properly cooked. At the other extreme, prolonged low-temperature cooking can dehydrate the entire piece before a satisfying crust develops.
Research on French fries demonstrates that texture changes with both temperature and time. One air-frying study found that moisture declined significantly as temperature and cooking duration increased. The same research reported favorable physical attributes under several tested combinations, including 180°C for 21 minutes, 190°C for 18 minutes and 200°C for 18 minutes. These are experimental findings, not universal cooking instructions.
A useful home technique is staged cooking.
Thick foods can first cook at a moderate temperature so heat penetrates toward the center, followed by a hotter finishing stage to accelerate exterior drying. Foods that are already cooked internally-leftover pizza, cooked fries or breaded leftovers, for example-often need less of the first phase and more emphasis on rapid reheating and surface dehydration.
The method should always be reconciled with food-safety requirements for raw animal products.
Step 8: Treat Frozen Food Differently From Fresh Food
Frozen fries, nuggets and similar foods often perform unusually well in an air fryer because many commercial frozen products have already been engineered for crisping.
Some are par-cooked. Some already contain oil. Their coatings and dimensions may have been designed around predictable moisture loss during final cooking.
Adding substantial extra oil can therefore be counterproductive.
Fresh potatoes present a different challenge. They begin with considerable internal moisture and lack the processing history of commercial frozen fries. Cut size, soaking, drying, starch content, oil distribution and cooking sequence consequently matter more.
Frozen foods also should generally remain frozen until cooking unless their instructions state otherwise. Partially thawing them can create wet surfaces and uneven cooking.
The broader principle is that “potato” or “chicken” is not enough information to determine technique. Fresh, frozen, precooked, breaded and battered versions can require substantially different treatment.
Step 9: Know When Crispness Has Gone Far Enough
More browning is not synonymous with better food.
The FDA explains that acrylamide can form from naturally occurring sugars and the amino acid asparagine in certain plant foods during high-temperature processes such as frying, roasting and baking. The agency reports that longer cooking and higher temperatures generally increase acrylamide accumulation.
For potatoes specifically, FDA advice favors cooking cut potato products to a golden-yellow color rather than brown, because darker areas tend to contain more acrylamide.
That guidance creates a useful boundary for crispness chasing. The objective is a dry, structured crust with appropriate browning, not the darkest surface an appliance can produce.
There is also evidence that air frying can alter acrylamide formation compared with deep frying. A 2022 study of French fries reported a maximum acrylamide reduction of 47.31% under its tested air-frying treatments compared with its deep-frying treatment. Such results are recipe- and process-specific; they do not mean every air-fried potato automatically contains 47.31% less acrylamide.
Temperature, duration, potato chemistry and final color still matter.
Step 10: Measure Doneness Instead of Judging Safety by Crispness
A browned crust cannot reveal whether raw meat is safely cooked internally.
That distinction is especially relevant in an air fryer because intense surface heating can make food look finished relatively quickly. USDA advises checking internal temperature with a food thermometer and gives minimum temperatures of 165°F (73.9°C) for poultry, 160°F (71.1°C) for ground meats, 145°F (62.8°C) for fish, and 145°F for whole cuts of beef, pork, veal and lamb followed by at least a three-minute rest.
The thermometer should be inserted into the thickest appropriate section rather than relying on surface color.
This separates two different jobs: the thermometer establishes safety; the exterior texture establishes whether the crisping process is finished.
When additional browning is wanted after a food has reached its required internal temperature, a brief high-temperature finishing period may improve the surface without unnecessarily extending the entire cook.
Step 11: Protect the Crust After Cooking
A surprisingly large amount of crispness can be lost after the basket opens.
Hot food still contains moisture. Steam continues moving outward after cooking. If freshly crisped food is immediately piled into a deep bowl, covered tightly or stacked piece upon piece, that vapor becomes trapped around the crust.
The exterior begins absorbing moisture again.
The result can be dramatic: fries that were crisp in the basket become limp several minutes later.
Freshly cooked food intended to remain crisp should therefore spend its first moments on a surface that allows steam to escape. A wire rack is particularly effective because air can reach the underside. A broad plate is preferable to a deep covered container when immediate serving is planned.
Sauces create the same problem deliberately. Water-based sauce softens dry crust. Foods such as wings remain crisp longer when sauce is added immediately before serving rather than far in advance.
Salt and other seasonings can also affect surface moisture, depending on the food and timing. Seasoning is therefore best treated as part of the cooking method rather than an automatic final gesture.
A Repeatable Crispness Checklist
Instead of memorizing a different trick for every recipe, the cook can work through a short diagnostic sequence:
- Dry the exterior thoroughly before cooking.
- Preheat when the appliance instructions and recipe make it appropriate.
- Apply oil thinly and evenly rather than heavily.
- Keep food loose enough for air to circulate.
- Use dry, adherent breading rather than excessively wet batter.
- Shake or turn food so shielded surfaces receive direct airflow.
- Use enough heat to dry and brown the exterior without burning it.
- Check raw meat and poultry with a thermometer rather than relying on color.
- Remove food when it reaches the desired golden, crisp stage instead of pursuing maximum darkness.
- Let steam escape after cooking and delay wet sauces until close to serving.
These steps address the same physical problem from different directions: removing enough surface water while supplying heat rapidly and evenly.
Why Some Foods Still Will Not Behave Like Deep-Fried Food
There is a limit to what circulating air can reproduce.
Deep frying transfers heat through direct contact with hot oil. Air frying transfers much of its heat through rapidly moving hot air, with a comparatively small quantity of oil present on or within the food. Those processes can create similar-looking products without creating identical structures.
The 2015 comparative study of French fries found differences in texture and sensory characteristics between air-fried and deep-fried products even when moisture and color characteristics were similar. A 2020 study likewise reported that deep-fat-fried products were crispier than hot-air-fried products at the same level of water loss under its experimental conditions.
That does not make air frying unsuccessful. It clarifies the engineering problem.
Trying to force an air fryer to behave exactly like a deep fryer can lead to excessive cooking, too much oil or unnecessarily dark food. Better results come from exploiting what forced hot air does particularly well: rapidly drying exposed surfaces on relatively small pieces of food.
Thin fries, wings, roasted chickpeas, breaded cutlets, Brussels sprouts, cauliflower and reheated fried foods all offer substantial exposed surface area. Dense casseroles, very wet batters and tightly packed foods do not.
Geometry matters almost as much as temperature.
The Real Advantage of Understanding the Process
Once the mechanism is understood, air-fryer troubleshooting becomes less mysterious.
Pale and soft food often needs a drier starting surface, better airflow or more effective heat exposure. Brown but limp food may have browned before enough moisture escaped. Crisp food that softens rapidly after removal is often being trapped with its own steam. Patchy browning points toward crowding, inadequate turning or uneven oil distribution.
The appliance itself certainly matters. Heater power, fan performance, basket geometry and temperature control vary. Yet technique can either exploit those characteristics or work directly against them.
A large basket filled to its limit is not necessarily operating at its effective crisping capacity. A 200°C setting is not useful if wet food is stacked so tightly that air barely reaches its surface. An extra tablespoon of oil cannot compensate for trapped steam.
The recurring pattern is surprisingly disciplined: dry first, expose the surface, use heat intelligently, then allow moisture to escape.
Final Considerations
The pursuit of crispier air-fried food is ultimately an exercise in controlling water.
Heat supplies the energy. Airflow carries moisture away. A modest quantity of oil can improve surface behavior and browning. Spacing exposes more food to the moving air. Turning corrects uneven exposure. A dry coating creates a structure capable of becoming brittle. Proper serving prevents escaping steam from undoing that work.
Published food-science research supports the underlying pattern: moisture loss, crust porosity, temperature, time and heat-transfer conditions all affect crispness. Air frying also differs materially from immersion frying, so recipes designed for a vat of hot oil cannot always be transferred unchanged to circulating hot air.
For the cook, the useful standard is not maximum temperature, maximum cooking time or maximum browning. It is controlled dehydration of the exterior while preserving the intended texture and safe temperature inside.
That makes the path to crispness less dependent on guesswork. A wet surface should be dried. A crowded basket should be divided. A pale coating may need better oil distribution or stronger finishing heat. A crisp crust that turns soft on the plate needs somewhere for its steam to go.
Once those variables are controlled, an air fryer becomes far more predictable-and crispness becomes something that can be engineered rather than hoped for.